Set distribution schedules for reports
Distribution of a report in Blue relates to the time frame that report viewers will receive report notifications. Users can access a report via a link in their Blue Landing page or via a link in an optional invitation email. In addition to setting the distribution of report notifications, the content of the invitation email can also be customized in Reports - Distribution.
Individual reports with distribution enabled are the only reports that can have distribution schedules based on date fields contained within the subject datasource.
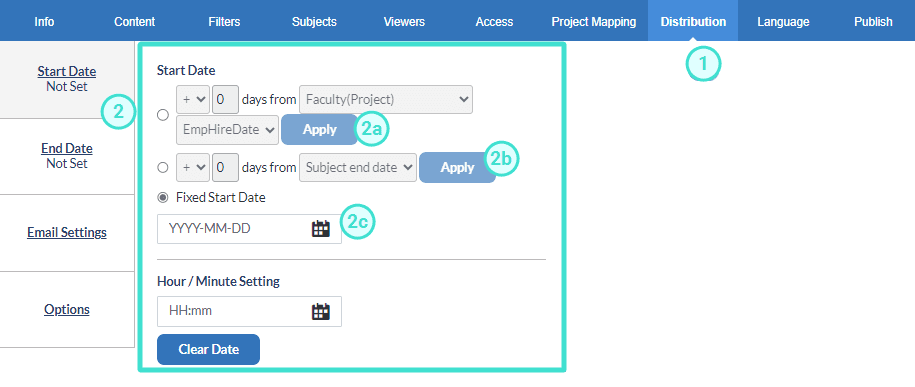
Report distribution start date - The earliest date that report notifications will be sent to report viewers. However report viewers may have access to their reports as early as the report start date, which is set on the publishing page. This is the date that emails will be sent to the report viewers.
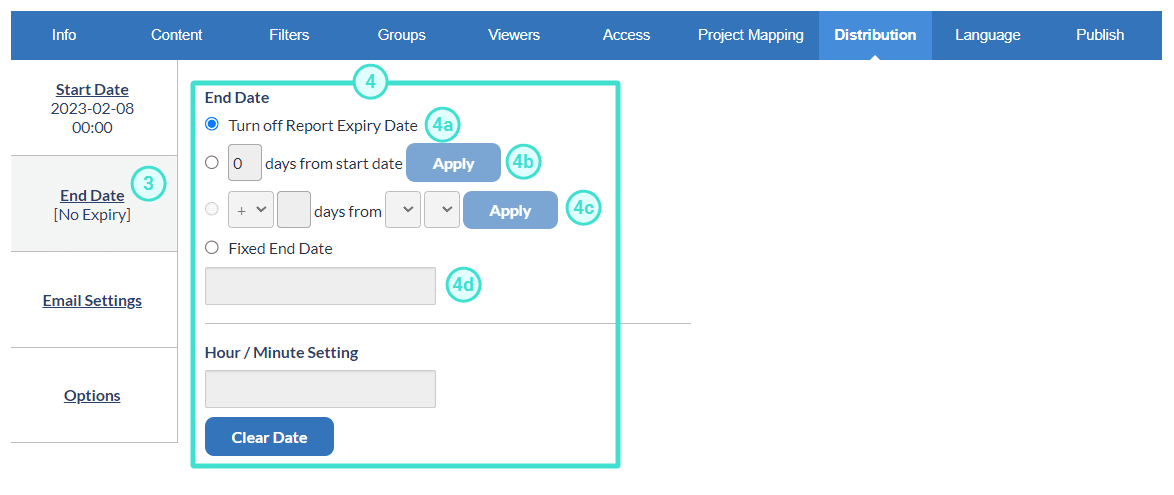
Report distribution end date - The last date that reports will be accessible to the report viewer. This end date only affects whether or not a user will have access to the report. The nightly report syncing process is controlled by the report end date or stop sync date on the publish page.
Setup report distribution
- Open a report and navigate to Reports - Distribution.
- Select one of the Start Date options and adjust the date accordingly.
- Plus or minus xx number of days from one of the date fields found in the subject or secondary subject datasource (only available for individual reports when Distribution is enabled).
- Use the (Project) option to base the distribution date on the snapshot of the demographic data being used in the project.
- Use the (Data source) option to base the distribution date on the latest demographic data available in the datasource. This option is typically used to control the distribution of the report based on external criteria.
- Plus or minus xx number of days from the Subject end date or the Secondary Subject end date (only available for individual reports when Distribution is enabled).
- Fixed start date.
- Plus or minus xx number of days from one of the date fields found in the subject or secondary subject datasource (only available for individual reports when Distribution is enabled).
- Select End Date.
- Select one of the End Date options.
- Turn off report expiry date.
- xx number of days from the start of distribution.
- Plus or minus xx number of days from the subject end date.
- Fixed end date.
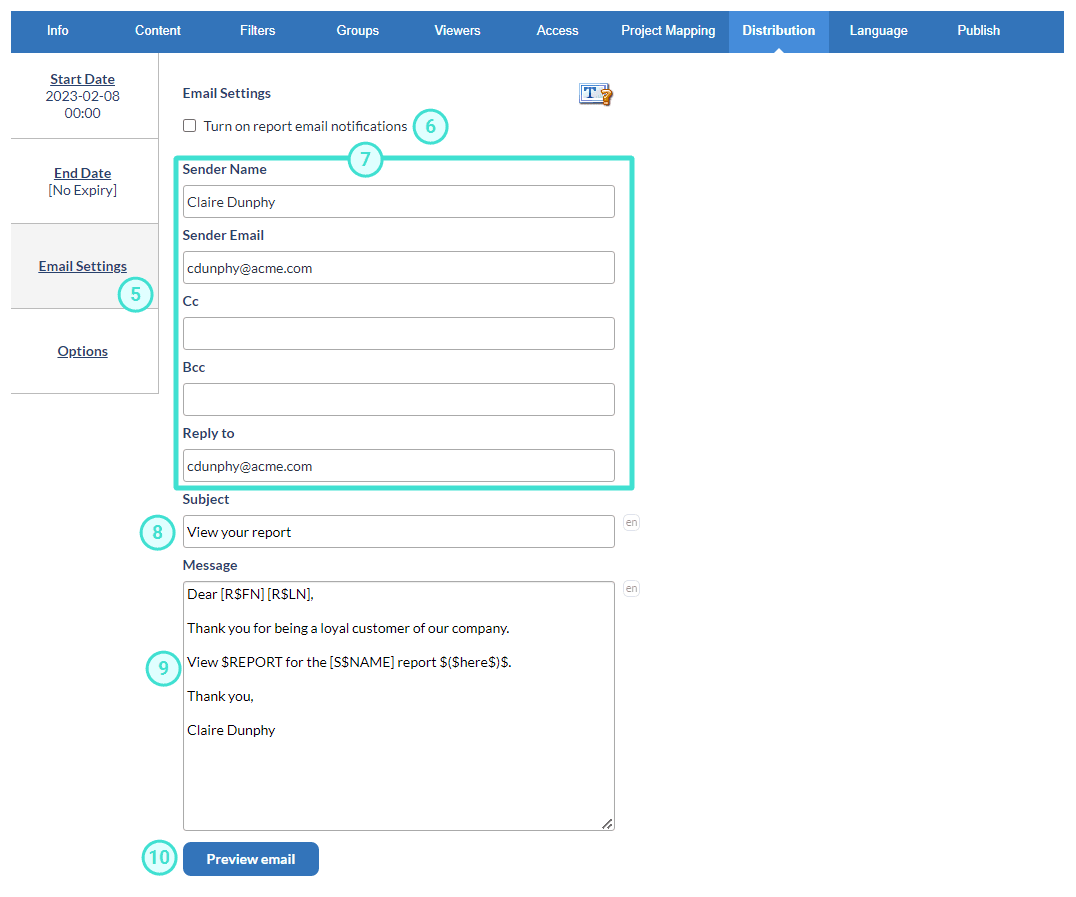
- Click on Email Settings to configure the form email that will be sent to all report viewers that have been included in this report and to adjust access security to the report. Learn more about
- By selecting Turn on report email notifications, Blue will send out automatic email notifications to all report viewers. Report viewers will still be able to access the report through a task that will appear in their dashboard.
- Complete email address related information such as the name and email address of the sender and the email where replies will be sent.
- Add a descriptive email title in the Subject.
- Include well worded, descriptive and personalized content to Message. The email can be personalized by including built-in symbols that are automatically replaced by corresponding data in the database. View the list of Built-in Field Mapping Symbols.
- Click Preview email to preview an example of what the email will look like.
- Save any changes.
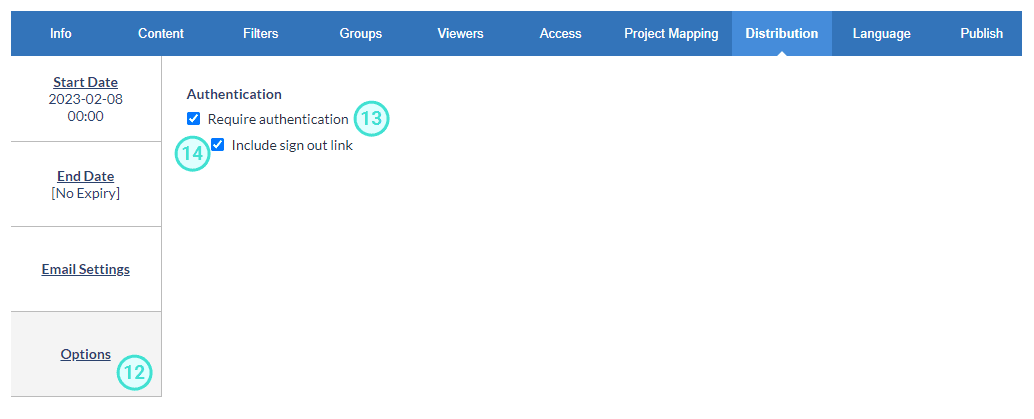
- Click Options to adjust options related to Reports - Distribution (Individual and Group by). Save changes to Reports - Distribution before continuing.
- Enable Require authentication to require users to sign in to Blue before being able to access the report.
- Enable Include sign out link to include a link on every page of the report that allows users to sign out of Blue.
Be aware that the preview emails will not contain any real data and will not contain any values for the field mapping that are used in the email. To truly preview what the email will look like, you will need to have Blue actually send an email through the project.