Setting up users and groups
This article will guide administrators and users step-by-step in managing users and groups within BlueX.
Account Management serves as the starting point for managing user and group access.
For administrators, clicking “Manage your users” in this block:
- Opens a new browser tab.
- Navigates directly to the User Management panel.
To manage users effectively within BlueX, it is recommended that administrators first create groups and assign the necessary privileges to these groups before adding users. By establishing groups aligned with roles, departments, or specific responsibilities, administrators can clearly define permission sets and ensure these are consistently applied across the organization. Once groups are created and privileges are configured, administrators can proceed to add users to the system and assign them to the relevant groups based on their roles and tasks within BlueX.
User groups for organized management
BlueX supports user groups to help administrators manage large numbers of users efficiently and organize them.
For example:
- group named “Survey Creators” can be created for staff responsible for designing and launching surveys.
- group named “Instructors” can be created for faculty who need to view course-specific survey results.
Accessing Groups in BlueX
Navigate to: System administration > Access Control > Groups
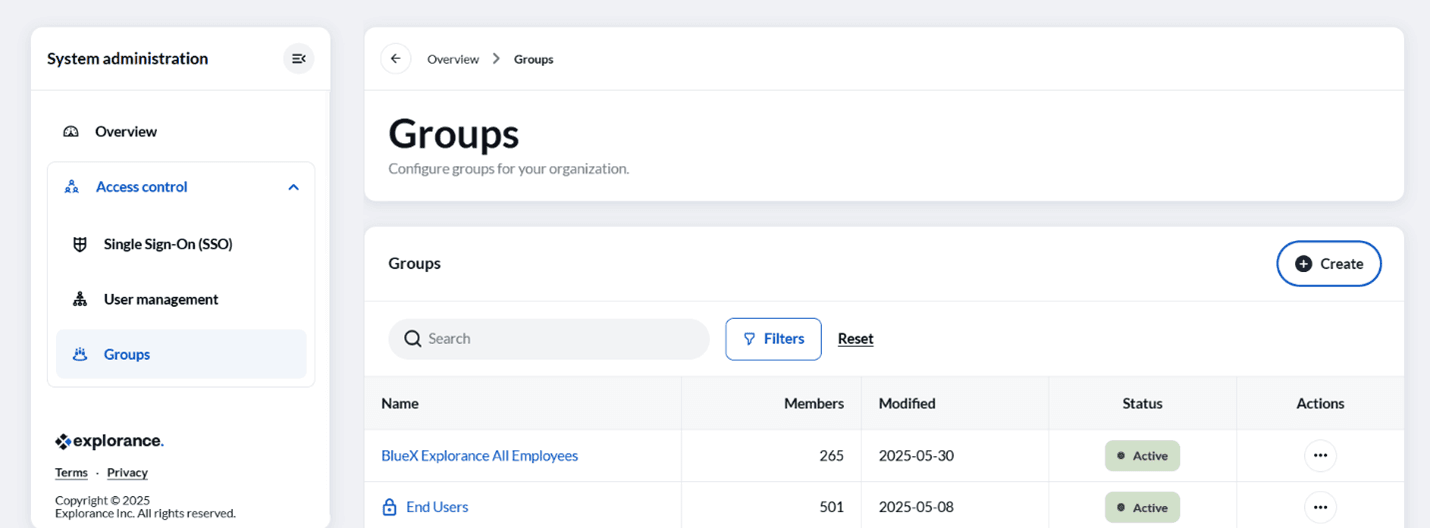
Here, administrators can:
- Click Create to open the Add a new group dialog box, where you can enter the group name and description.

- After creation, the group will appear on the Groups page. Click on the created group to manage its settings.
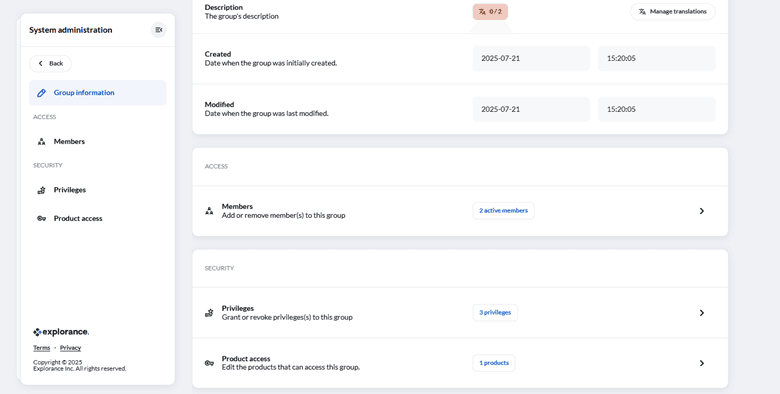
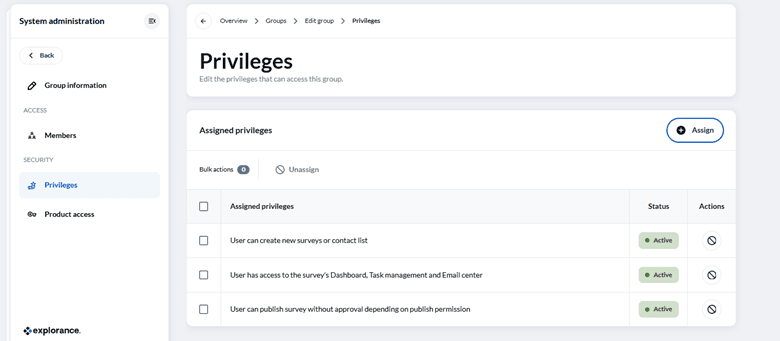
Within the selected group:
- Navigate to Security > Privileges to view or adjust privileges.
- Click the Assign button to open the Edit Privileges dialog box, allowing you to add or remove privileges as required.
Administrator capabilities within groups:
- Create and clearly name groups for ease of identification.
- Assign users to one or multiple groups based on their responsibilities.
- Manage memberships individually or in bulk, which is particularly helpful during large organizational changes.
Users in a group inherit any privileges assigned to that group, ensuring consistent permissions and reducing the need to manage privileges individually for each user, simplifying administrative tasks and ensuring efficient scaling as your organization grows.
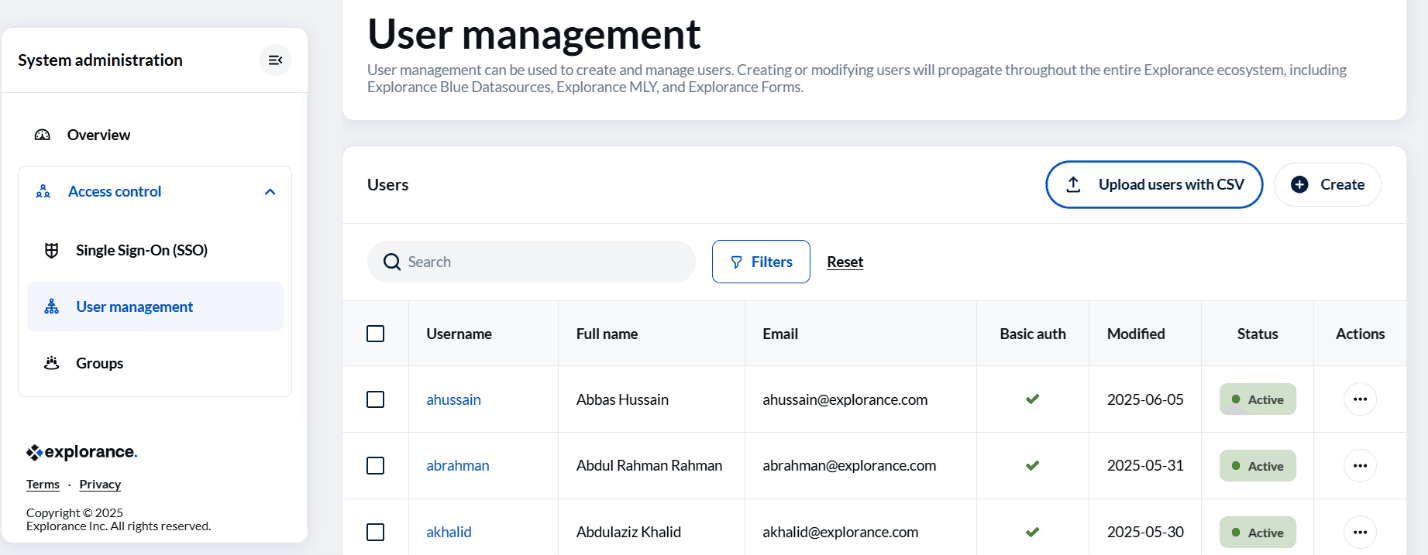
Adding users to BlueX
BlueX provides two primary methods to add users to the system, catering to both small-scale and large-scale onboarding needs:
Adding users individually
Administrators can manually add users by:
- Clicking the Create button within the User Management panel.
- Entering user details including first name, last name, email address, username, and specifying the authentication method (standard password or SSO).
- Assigning the user to appropriate groups to automatically apply necessary permissions.
This method is ideal for quickly adding a few users and handling urgent individual access requests while maintaining structured privilege management within BlueX.
Bulk uploading users using CSV
For adding many users simultaneously, BlueX offers a CSV upload feature:
- Click the Upload users with CSV button to open the Upload Users pop-up.
- Upload the CSV file by:
- Dragging and dropping the file into the window, or
- Selecting the file from your system manually.
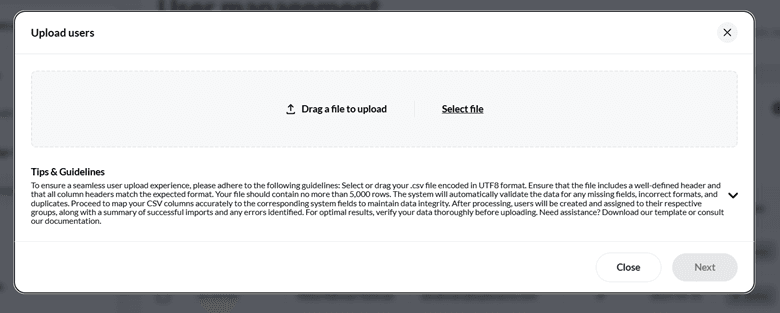
- Click Next to proceed to the mapping screen.
During the upload, administrators can:
- Dynamically map CSV columns to system-defined fields such as names, usernames, email addresses, user status, and organization-specific fields such as custom demographics.
- Include user preferences, such as alternate email addresses for communications and login configuration details.
- Validate uploaded data to ensure accuracy and reduce upload errors using the system’s clear validation prompts.
Once uploaded, all users are automatically placed into the mandatory “Everyone” group, ensuring consistent baseline permissions and essential communications are applied uniformly across all users.
This bulk upload method saves administrative time, particularly during the onboarding of new departments, cohorts, or during system migrations, while ensuring a structured and consistent approach to user management aligned with organizational needs.
Keeping user lists updated automatically
BlueX can automatically update user lists by connecting with your organization’s existing systems, such as directory services like Active Directory and learning management platforms like Canvas. If this feature is enabled by your organization, it ensures that user records remain current as staff and students join, leave, or change roles, reducing the need for manual administrative work by administrators. This also ensures that only authorized and current users retain access to BlueX features and surveys. This automated process supports your organization’s IT practices, maintains a secure and accurate user environment, and aligns with data governance and compliance requirements.