Glossaries
Introduction
Many clients have comments that contains abbreviations, acronyms, industry-specific terms and / or special phrases which are difficult to detect using machine learning. For example, “PS” meaning “professional service”, would not be analyzed because the model would not be able to match it to any topic. In addition, other organizations might use “PS” to refer to peer support, performance standard, program specialist, etc. To help MLY better understand the terms used by your organizations or institution, you can create Glossaries to customize the output of the analysis to more closely match the comments provided by your employees and students. This feature allows MLY to map the Terms (abbreviations, words or phrases) to their Definitions, resulting in a more comprehensive and accurate analysis.
An overall comprehensive glossary can be created for your organization or institution covering all of the terms used, and / or multiple glossaries can be created for specific initiatives such as onboarding new employees, career development plans, special projects in specific departments, etc. to help increase the number of analyzed comments as well as deepen the insights produced by the analysis.
Define glossaries
- From the homepage left side taskbar menu, click on the
 icon in the left side taskbar.
 - Select Glossaries from the drop-down menu.
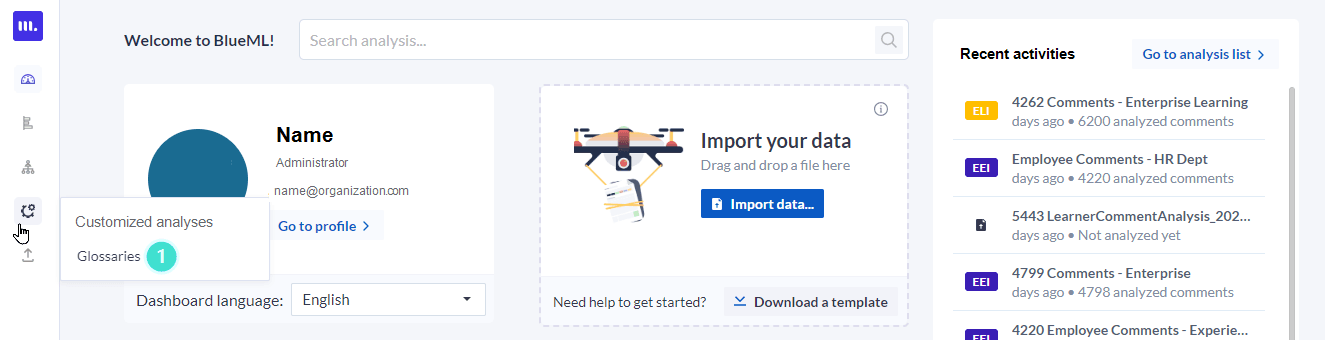
- Click Create glossary.
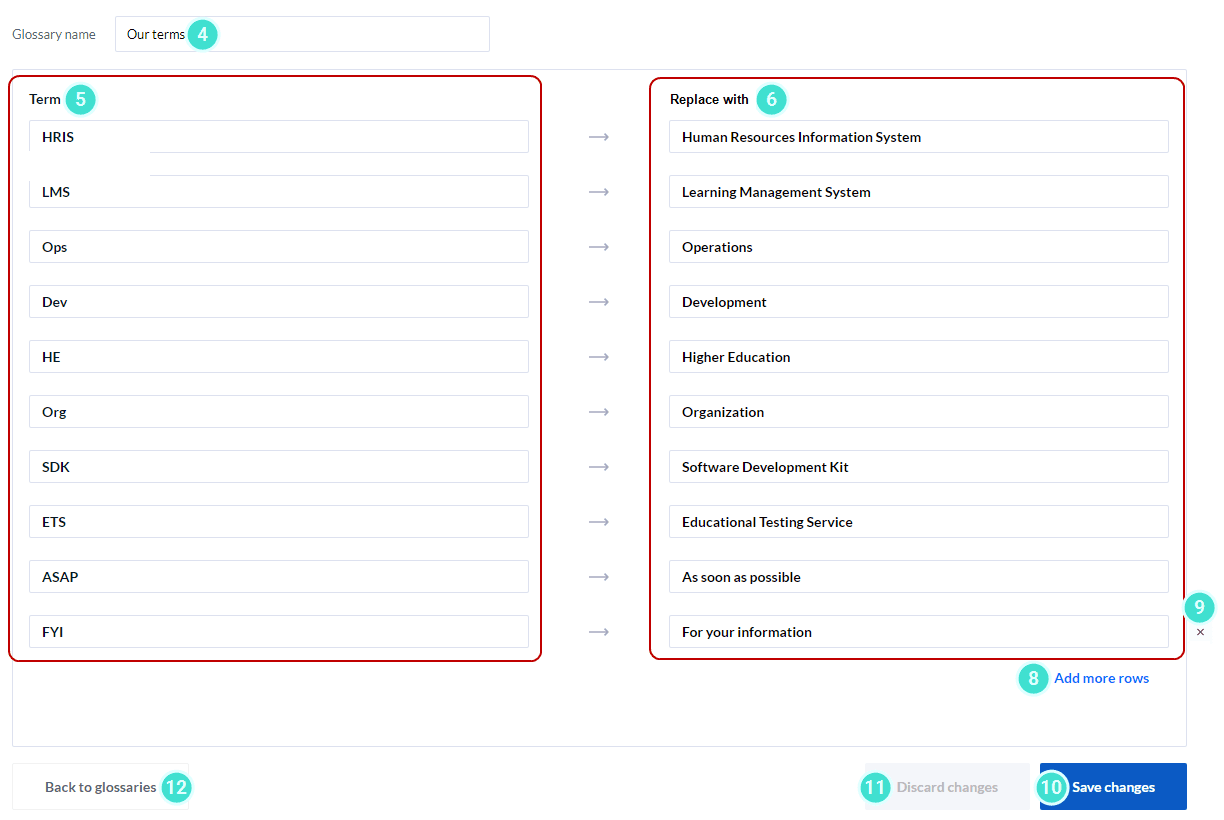
- Enter a Glossary name.
- In the Terms column, enter your abbreviations, words or phrases.
- In the Replace with column, enter text to identify or describe the term. Keep the text as short and specific as possible so that it will be easy for machine learning to use it as a replacement to analyze your term.
- Repeat steps 5 and 6 until you have entered all of your Terms.
- If you need more rows, click Add more rows.
- To delete a row, hover over the right side of the row and click the x icon.
- Once your list is complete, click Save changes.
- To leave without saving your changes, click Discard changes.
- To return to a list of your Glossary, click Back to glossaries.
- Users can create an unlimited number of Glossaries with an unlimited number of Terms.
- The Terms can be an abbreviation, a word(s) or even a sentence.
- The Term field allows up to 100 characters to be saved.
- Abbreviations or acronyms (terms) that mean the same thing can be mapped to the same text, however the same term cannot have more than one descriptive text.
- MLY refers to the glossary during the analysis to better understand the comments, but does not change the original text of the comments.
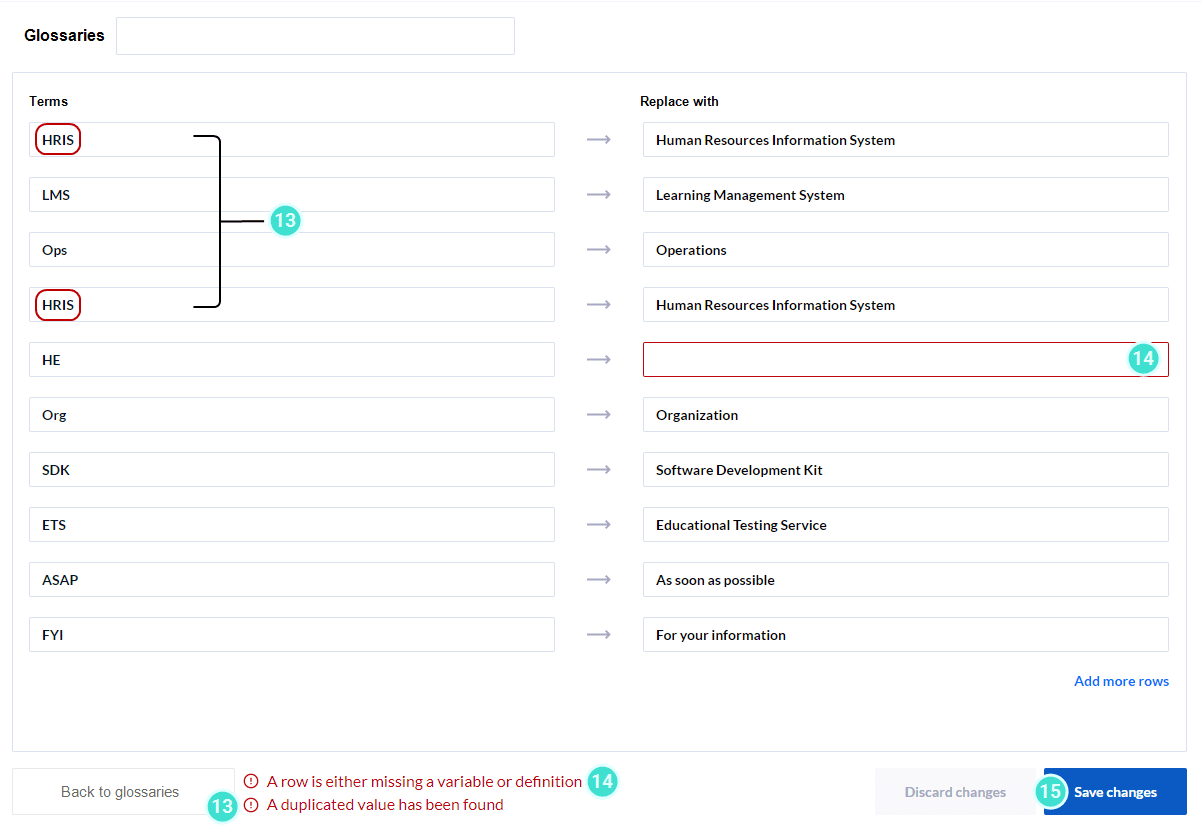
Error messages highlighted in red may appear on your Glossary screen as you are creating your terms and entering their definitions:
- If you have entered two or more identical Terms, one or more must be changed to allow MLY to analyze that term (see error message at bottom of screen).
- If you have left the Definition field empty, enter your definition. (see error message at bottom of screen)
- Click Save change to update your Glossary.
- Multiple Terms can have the same definition if different abbreviations or acronyms are used in different department or locations of your organization.
- The file name for your Glossary can be changed at any time.
- The Dashboard will display the original text. The definition provided for the Term is only used by the models.
- Functionality to import Terms with their definitions using an external mapping file such as an Excel or CSV file is not currently available.
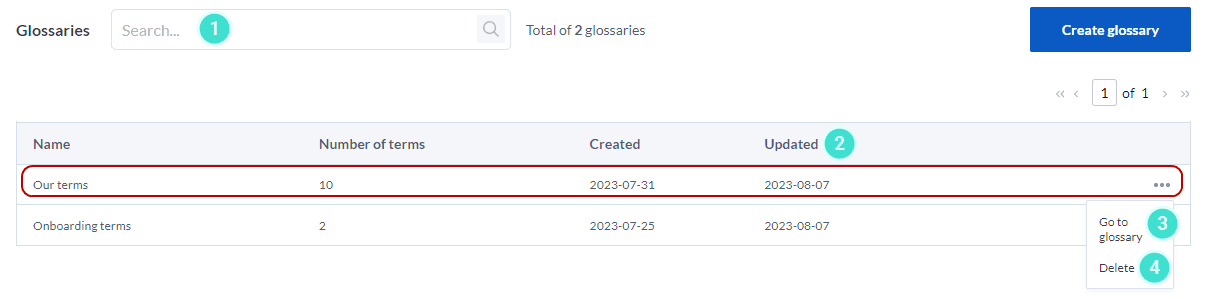
Manage your glossaries
- Search for an existing Glossaries by entering its name in the search field.
The following columns provide additional information about each Term listed which can be helpful when you are looking for a particular group:
- Number of Terms contained in your group
- Date created
- Last updated
- Up or down arrows will appear when you hoover next to the Updated column. Click on the arrow to sort by date last updated.
- To access a glossary, click on the more options
 icon and select Go to glossary in the drop-down menu.
 - To delete a glossary, click on the more options icon and select Delete in the drop-down menu.