Widgets
Introduction to widgets
Widgets are an excellent starting point to monitor learning effectiveness and stay informed about employee or student experience, as well as identify areas that require attention. They offer a variety of filtering options, allowing you to tailor the results to the topics and areas that are of greatest interest to you. This strategic approach streamlines the decision-making process, enabling you to swiftly and effectively determine the best course of action.
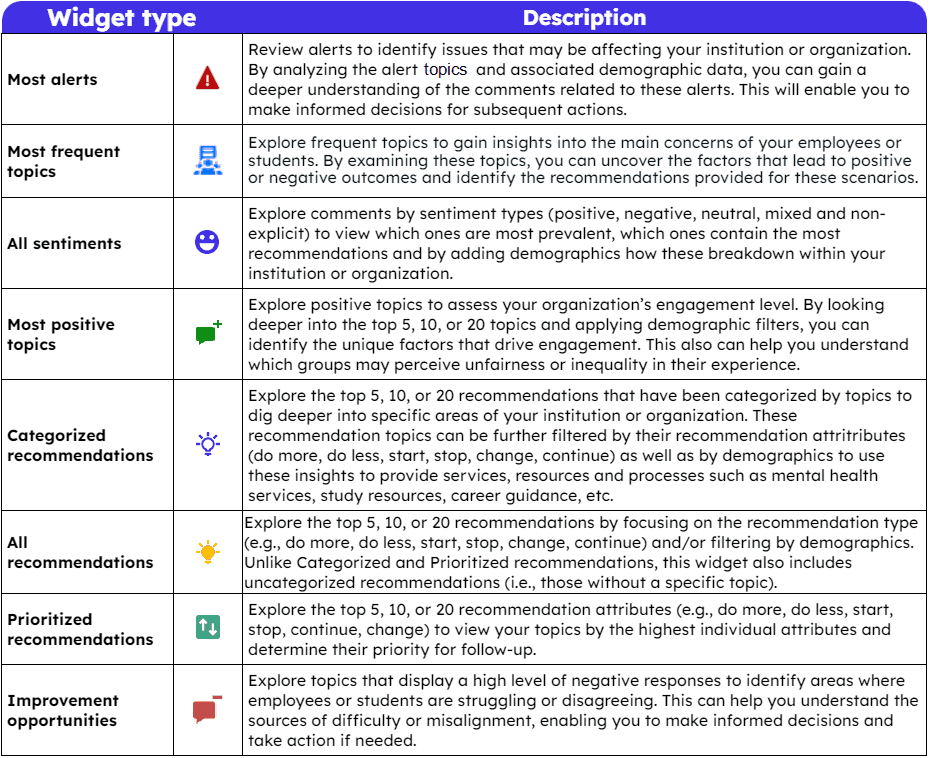
MLY provides 8 widget types to explore your analysis results:
The insights displayed in all widgets contain data specific to your analysis.
When you analyze your comments using SEI, EEI or ELI, the following widgets will appear by default in the widget section:
- Prioritized recommendations
- Most frequent topics
- Most positive topics
- Improvement potential
When you analyze your comments using SRA, the following widgets will appear by default in the widget section:
- All recommendations
- All sentiments
Follow the instructions below to create new widgets or modify the default widgets.
Add new widgets
To set up a new widget:
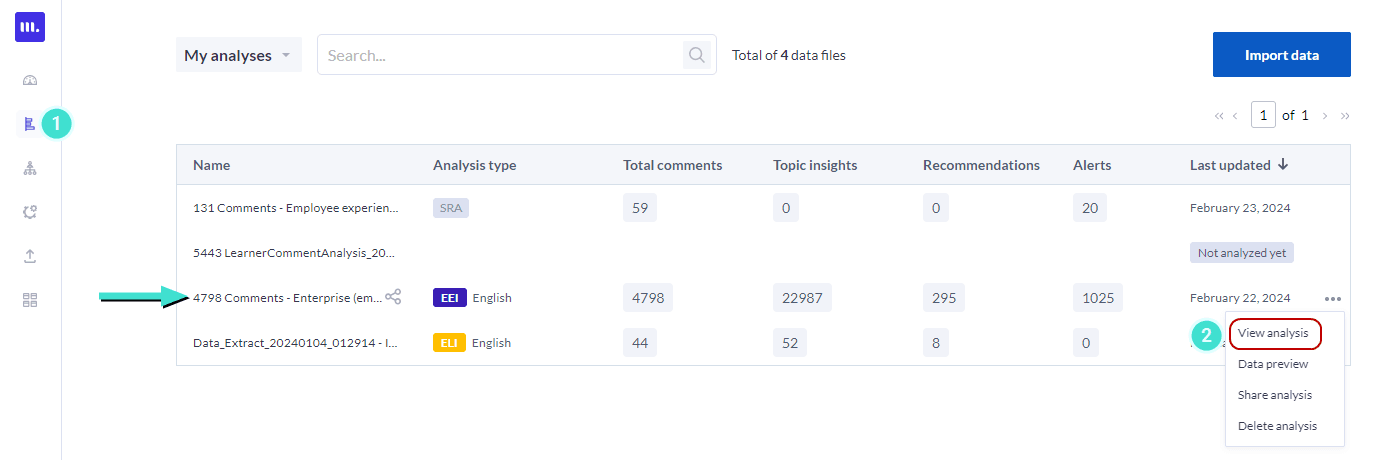
- Click on the
 icon in the side bar menu to access the Analysis List.
 - Hover over the Last updated column to the right of your analysis and select View analysis from the drop-down menu.
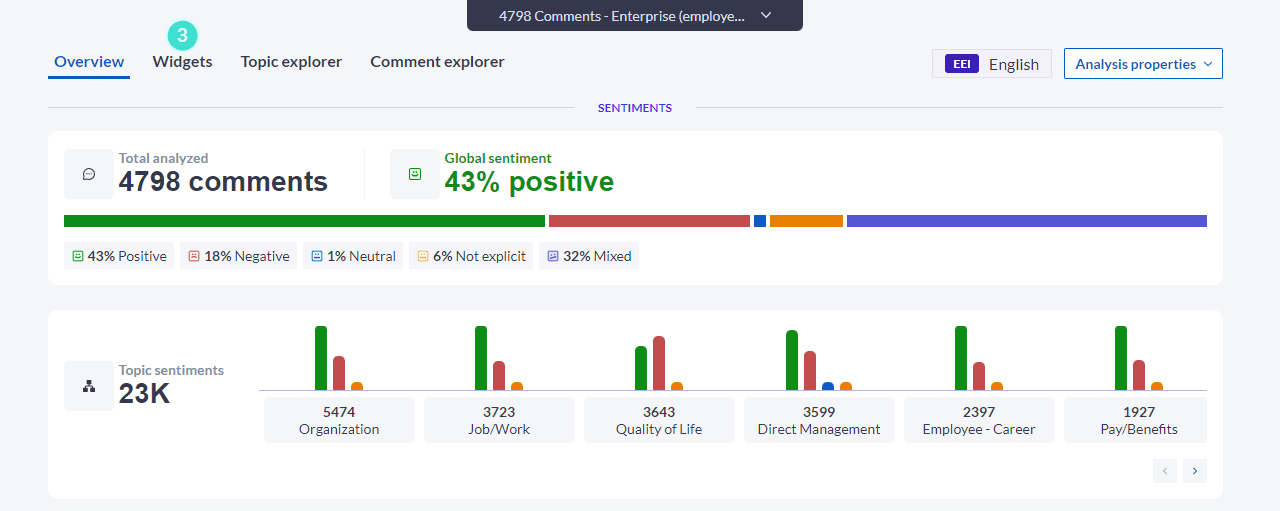
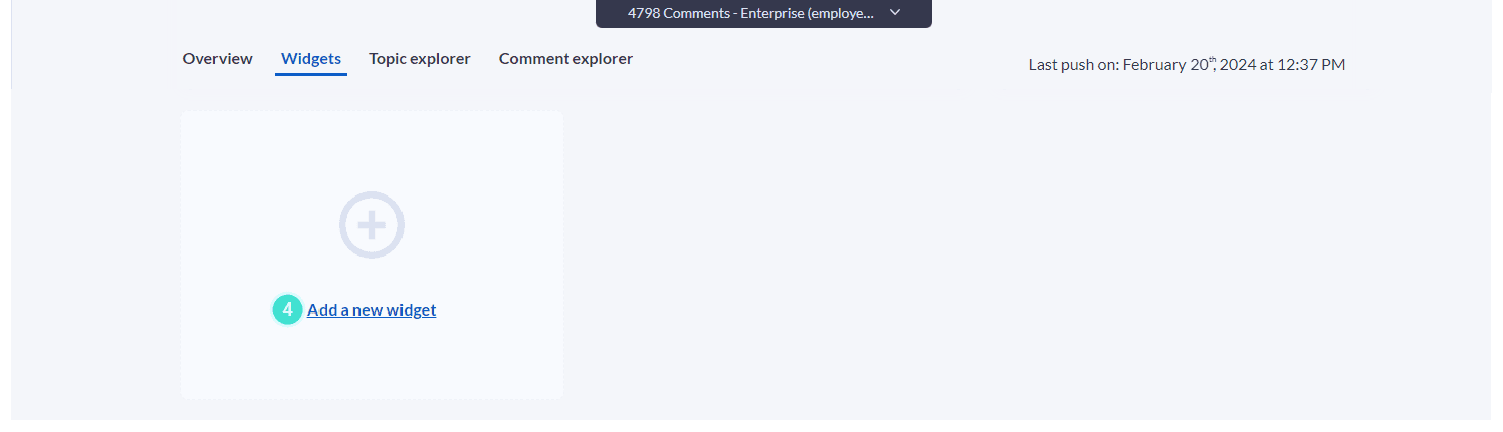
- Click the Widgets tab of in the analysis Overview screen.
- Click on Add a New Widget located near the bottom of the screen.
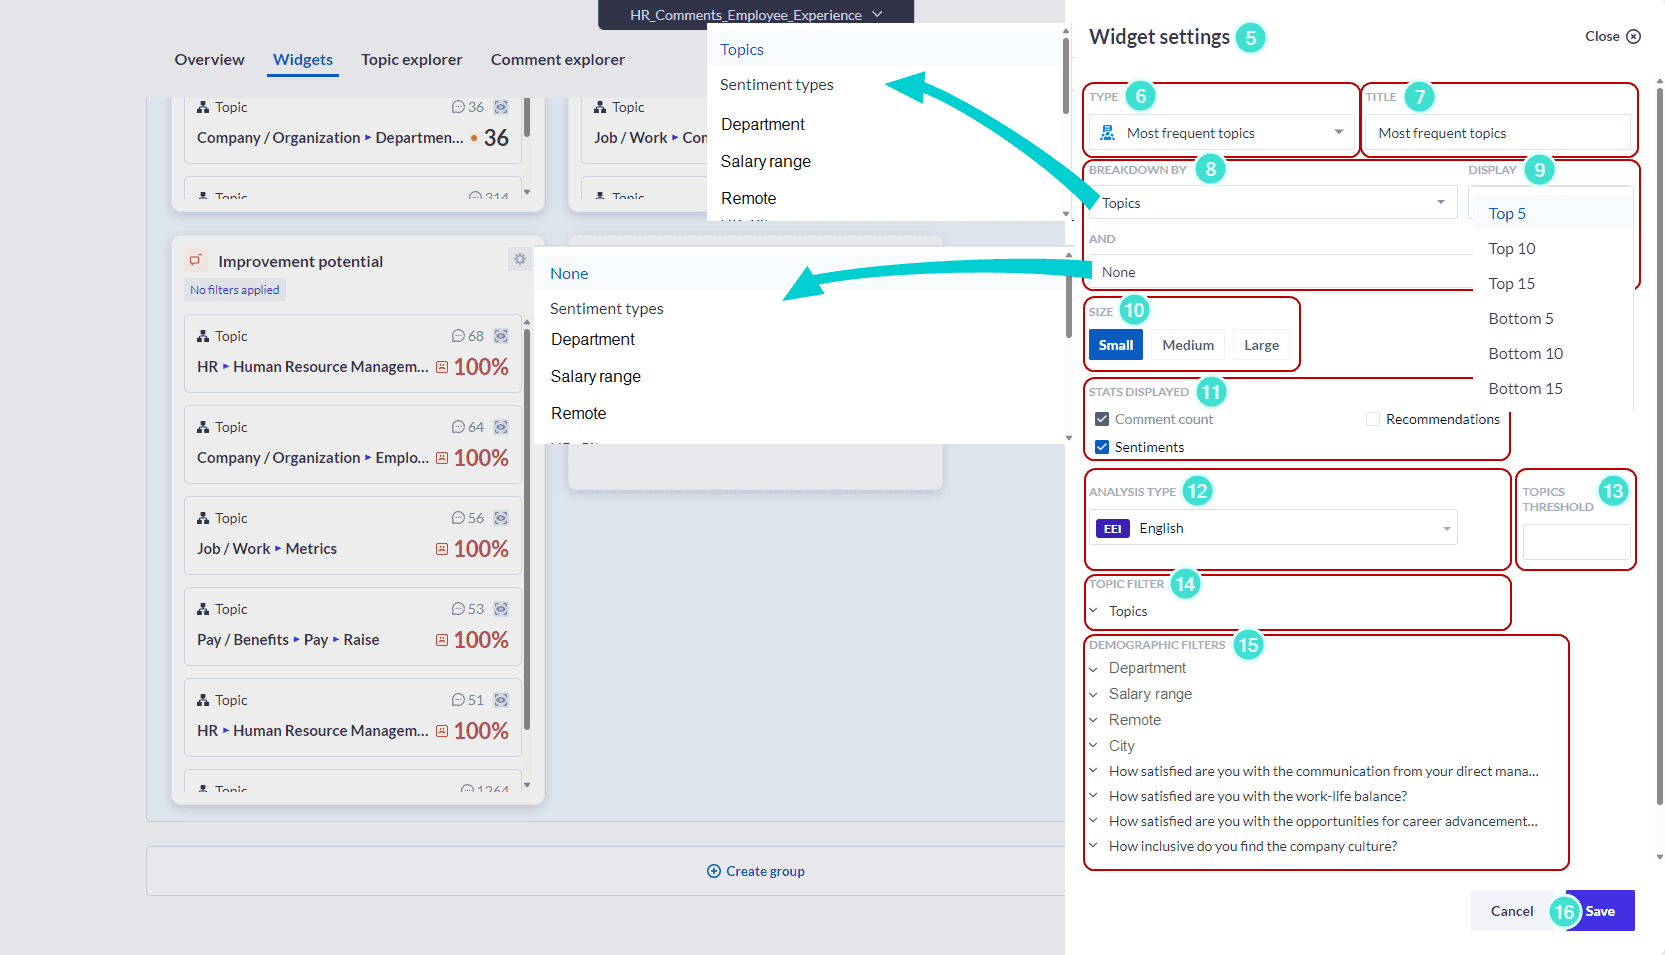
- From the Widget settings pop-up window:
- Select a Type of widget.
- Enter a Title for your new widget.
- Select a value for the 2 Breakdown fields.
- Select a value for the Display by Top 5-10-20 or Bottom 5-10-20 values.
- Select a Size for the widget from these options: Small, Medium, Large.
- Check the Stats display boxes you wish to include from these options: Comments count, Sentiments, Comment, Recommendations.
- To select one of your Customized analyses, click on the down arrow of the drop-down menu under Analysis type.
- Set a Threshold for the number of comments required by each topic to display the actual comments in the Comments explorer (for confidentiality purposes).
- To select Topic filters, click the down arrow of the drop-down menu and check the topics that will be used.
- Click on the down arrow of the Demographic filters to view drop-down menu and select the demographics that will be used.
- Click Save.
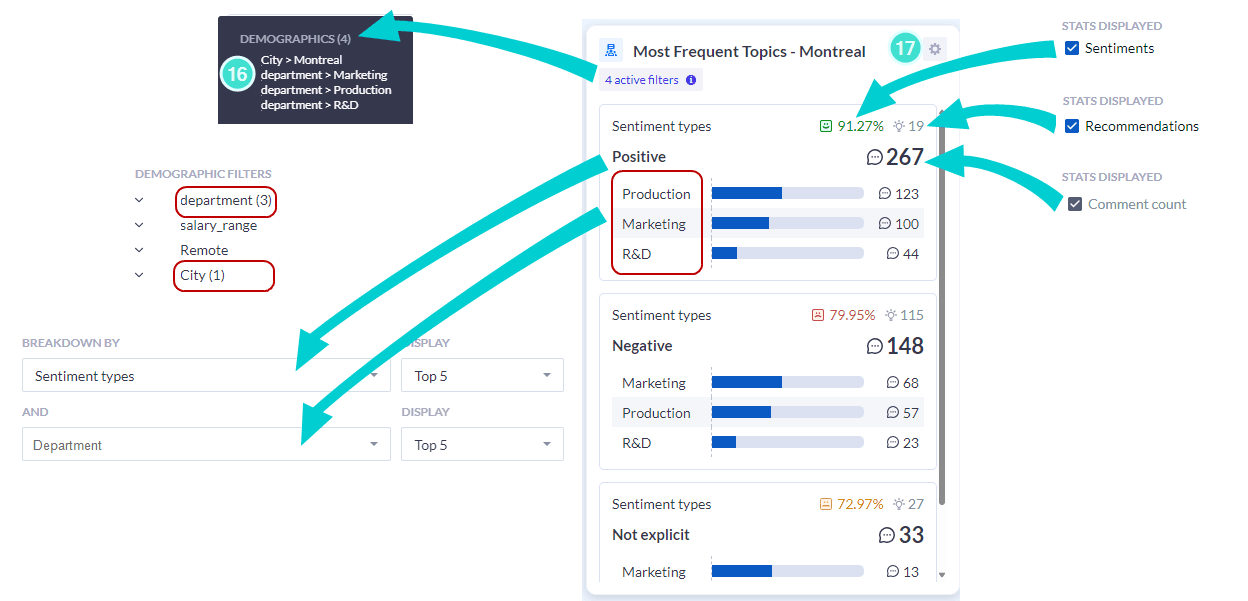
- Your new widget will display the number of active filters. To view a preview of the filters used for this widget, hover over active filters.
- To modify this widget, click on the gear icon to return to the widget setting pop-up window.
Manage widgets
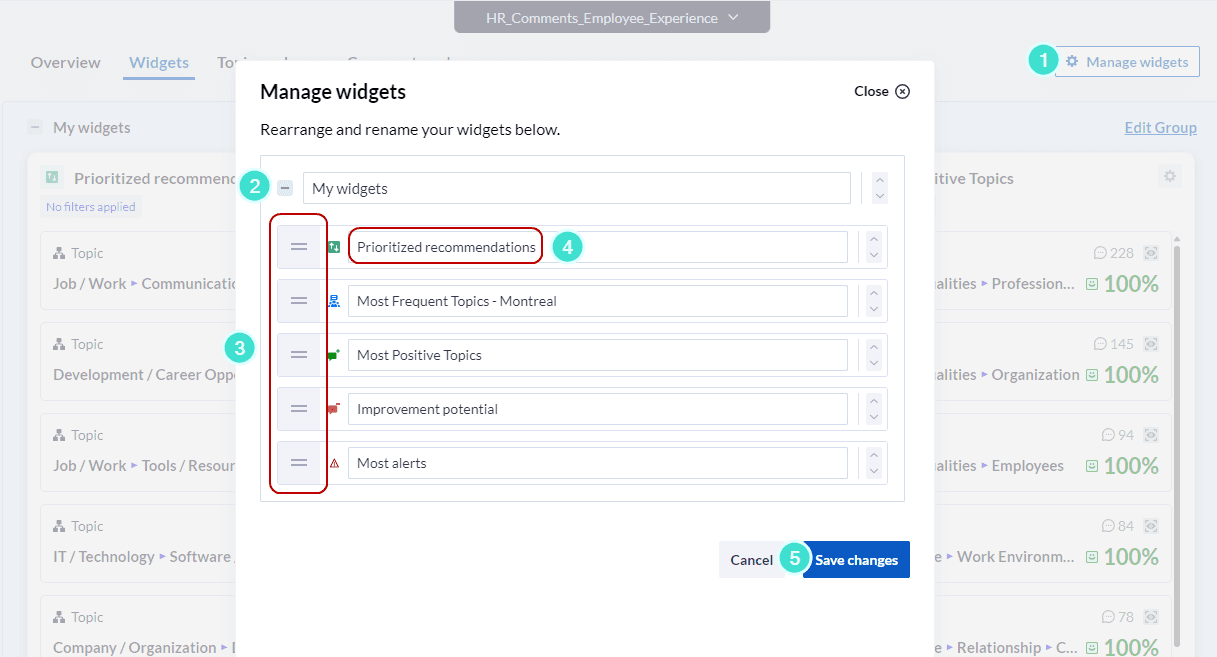
- Click on the Manage widgets button.
- Select and open your widget group.
- Click and hold the = icon on the left of the widget name to move it up or down.
- You can also rename your group of widgets or the individual widgets in this section.
- Click Save changes.
Create widget groups
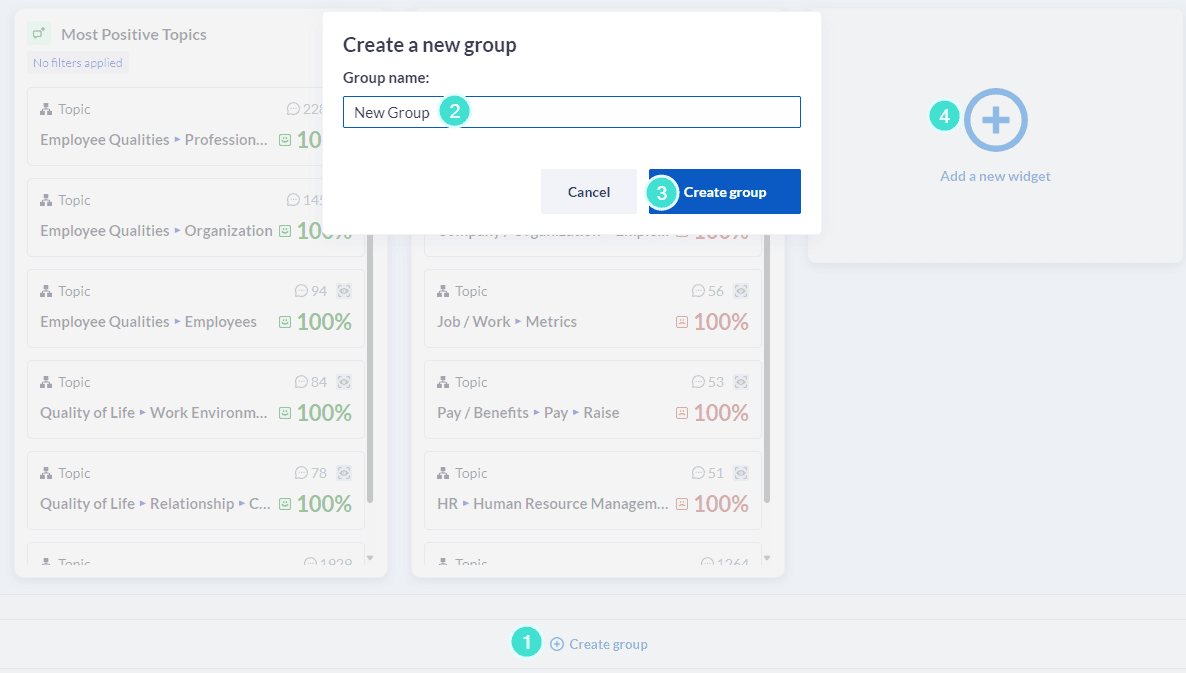
- At the bottom of your widget section, click on Create group.
- Enter a Group name in the field provided.
- Click Create Group.
- Click Add a new widget to add widget to your group.
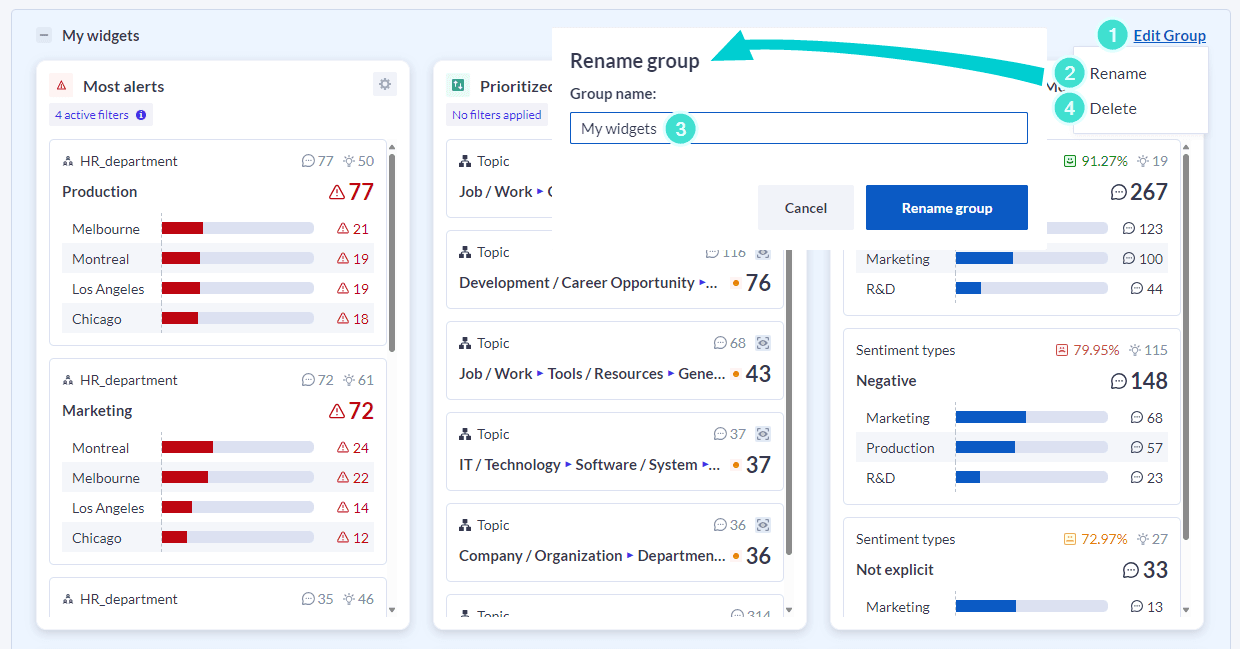
Edit widget groups
- Click on Edit Group
- Select Rename and enter a new or revised name in the pop-up window.
- To save change, click Rename group.
- Click Delete to remove this group from your analysis.
Delete widgets
- Click on the Settings icon.

- In the Widget settings pop up window, click on Delete this widget.
