Cornerstone
Prior to integrating the Blue Connector with Cornerstone, it's advantageous to adhere to the steps below. This helps streamline the integration process, guaranteeing the Blue Connector operates optimally within your Learning Management System environment.
- Understanding the Blue Connector: Blue Connector seamlessly integrates Blue, a feedback management tool, with LMS platforms in this scenario, the Cornerstone. Foundational concepts of Blue Connector and Basic Blue Connector setup instructions are provided in resources such as the Fundamentals of Blue Connector and Basic Configuration of Blue Connector articles.
- Utilizing the Universal Pathway: The Blue Portal Integrator (BPI) acts as the interface between Blue and LMS platforms. The Universal Pathway which is a component of BPI, streamlines task management and data exchange, thereby enhancing the user experience. Detailed setup instructions for the Creation of Universal Pathway are available.
Seamless integration of Blue Connector and Cornerstone
Integrating the capabilities of the Blue Connector with Cornerstone's distinct features enhances data exchange and improves the user experience. Whether it involves task assignment, notification management, or access control, the integration strives to optimize every aspect of educational interaction within the LMS environment. By following the detailed instructions provided in this Blue Connector - Cornerstone LMS integration guide, stakeholders can ensure a smooth transition and fully exploit the potential of the Blue Connector within Cornerstone. This document is designed to guide an experienced administrator through the integration process between the Blue Connector and Cornerstone.
Integration procedure
The integration between Blue Connector and Cornerstone offers a streamlined solution to enhance feedback collection and user engagement within the Cornerstone platform. To initiate the integration, administrators create an OAuth 2.0 application within Cornerstone, laying the groundwork for seamless communication. Within Blue Connector, administrators then establish a Cornerstone consumer, facilitating data exchange between the two systems. Finally, administrators add the "Blue Course Evaluation" tool to a custom page in Cornerstone, enabling users to conveniently access Blue Connector functionalities directly from their learn panel, thereby enhancing accessibility and user experience. The steps for integrating the Blue Connector and Cornerstone are:
- Step 1 - Create OAuth 2.0 application in Cornerstone.
- Step 2 - Create the Cornerstone consumer in the Blue Connector.
- Step 3 - Add "Blue Course Evaluation" tool to Cornerstone custom page.
- Step 4 - Install the Blue Connector login prompt.
Step 1 - Create OAuth 2.0 application in Cornerstone
To commence the integration between Blue Connector and Cornerstone, administrators begin by generating an OAuth 2.0 application within the Cornerstone platform. This crucial step lays the foundation for configuring seamless communication between the two systems, enabling data exchange and interaction. Complete the following steps to start configuring the integration between Blue Connector and Cornerstone:
- Log in to Cornerstone using Administrator credentials.
- Go to the Admin - Tools section called Configuration Tools.
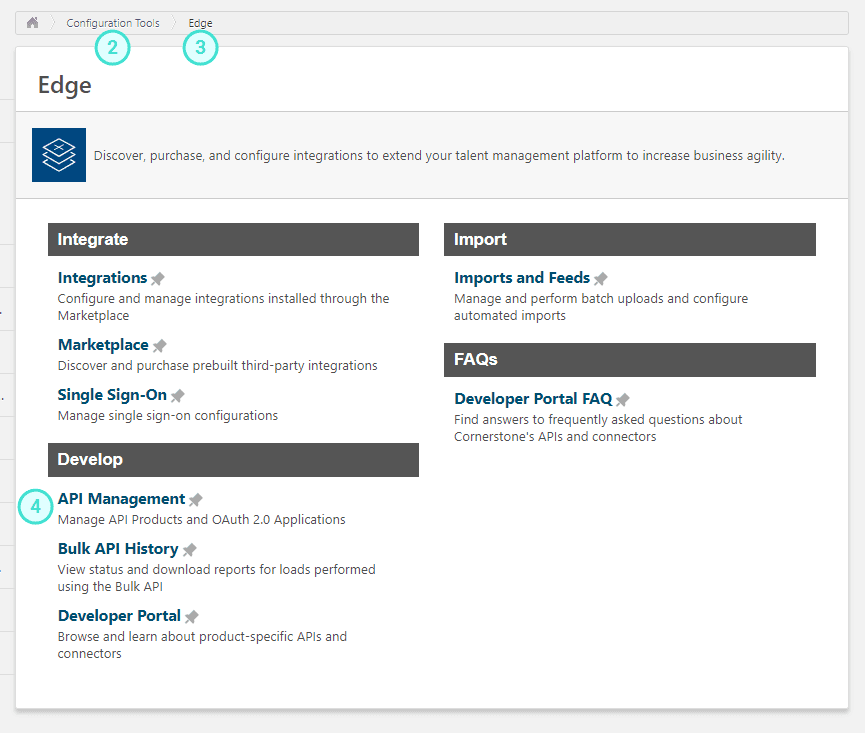
- Select the EDGE section under the Admin panel.
- Go to the API Management section from the Development panel. This will open a new tab (EDGE | API Management).
- Click on the Manage OAuth 2.0 Applications section.
- Click on Register New Application.
- Enter an Application Name (Example: Blueconnector integration).
- Enter the User ID that is creating this integration (i.e. the Cornerstoneadmin).
- Go to the Cornerstone API section and check/select the GET employee:read. A list of endpoints associated with that function will appear on the right side of the page under Endpoints.
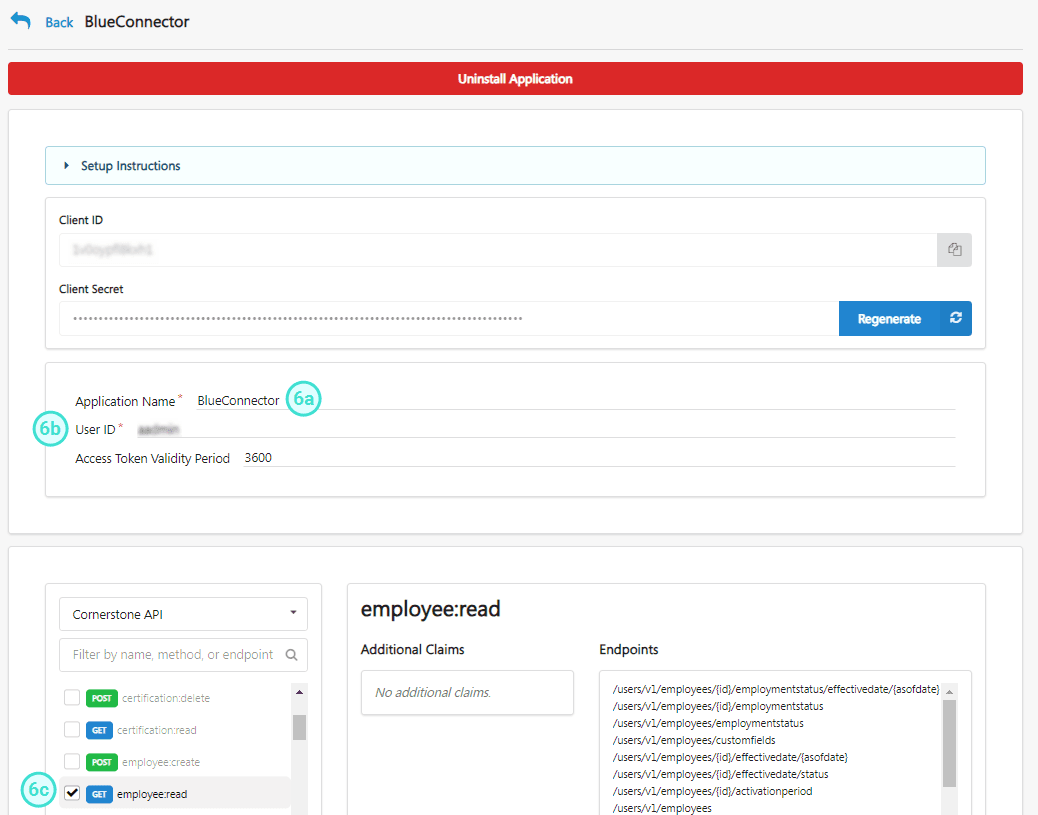
- Copy the secret key that will appear in a pop-up once the application is registered. This secret key is only displayed once, so it's important that you save it someplace safe or you will need to generate a new key.
- Copy the Client ID. This will be needed to configure the integration between Blue Connector and Cornerstone.
- Close the Edge|API Management browser tab.
- Go back to the Configuration Tools section.
- Navigate to Core Functions.
- Open the Core Preferences section.
- Select the Custom pages section.
- Click Create Custom Page to create a new page.
- Click Apply on the configuration layout pop-up that appears.
- Enter the Name of the custom page (for example: "My Course evaluations").
- Scroll down to click on Save and exit.
Later you will need to edit this page and add a custom iFrame in the Description section. The code for the custom iFrame will be available on the Blue Connector CornerstoneConsumer details page.
After successfully completing the above steps, gather and complete the details in the following table and send it to your Explorance integration team contact:
| Information | Description | [Your Details] |
|---|---|---|
| Cornerstone | The URL to access Cornerstone. | |
| Tool name | The name of the OAuth 2.0 application created in Cornerstone. | |
| Application ID | The OAuth 2.0 application ID. | |
| Application secret | The secret key obtained during OAuth 2.0 application creation process. | |
| Application User name | The user ID used to create the OAuth 2.0 Application. | |
| Custom Page URL | Example: [Cornerstone URL]/catalog/CustomPage.aspx?id=IdOfTheCustomPage |
Step 2 - Create the Cornerstone consumer in the Blue Connector
Within the Blue Connector interface, administrators proceed to create a Cornerstone consumer. While this step is typically handled by Explorance integration services, it's provided to ensure administrators have a comprehensive understanding of the integration process. Creating the consumer establishes a connection point between Blue Connector and Cornerstone, facilitating data exchange.
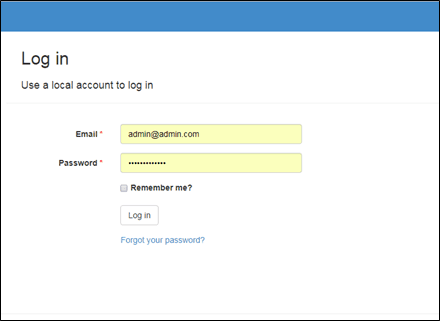
- Log in to the Blue Connector as an administrator.
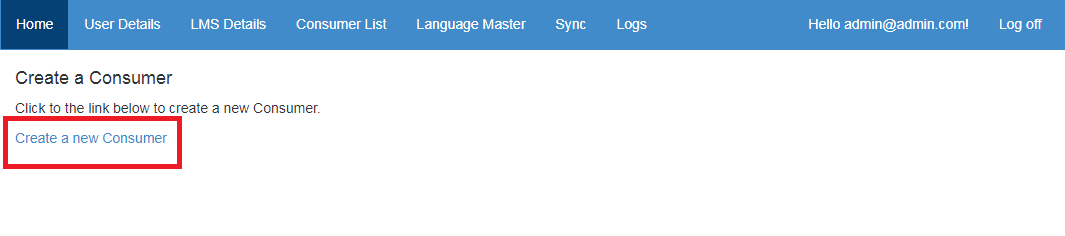
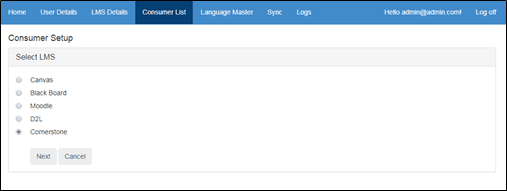
- Select Create a New Consumer on the homepage to create an LTI Consumer for Cornerstone.
- Select Cornerstone from the list and choose Next.
- Complete the mandatory fields and complete the LTI Tool setup:
- Consumer Name
- Consumer URL - The Cornerstone URL.
- Application ID - API key generated during the Cornerstone Configuration
- Application Secret - API Secret generated during the Cornerstone Configuration
- Application User Name - The Cornerstone admin user name, it will be used to call APIs.
- Block URL - (optional) The BPI Report Block URL without any parameters e.g. (
https://prodmgmt.explore-blue.com/prodmgmtBPIV2/reportview.aspx) - Block ID - (optional) The Report block ID, can be obtained from the Report Block URL.
- Custom Page URL - URL of the custom page created in Cornerstone.
- The Consumer key and Shared Secret are automatically generated.
- Enable the Enable Task API (required only for MTM and BlueX integrations).
- Decide if Automatically delete completed tasks should be enabled.If this setting is enabled then a background job will run everyday and remove all the completed tasks from Blue Connector (Task status =2) so that those tasks would not be visible to students / users in LMS.
- Decide if tasks will open in a new browser tab.
- Select the User ID field that is available in Blue. It will be either an Internal User ID or the User ID.
- Select the Default Language. This should be the language that will be used if a user language is not available in Blue
- Select additional languages in the Language field. The field is a multi-select control; select all languages for which Blue will be capable of sending tasks for Cornerstone users.
- Click Save and Next. If the details are entered correctly then they will be saved and another screen will appear where additional settings can be configured for all selected languages.
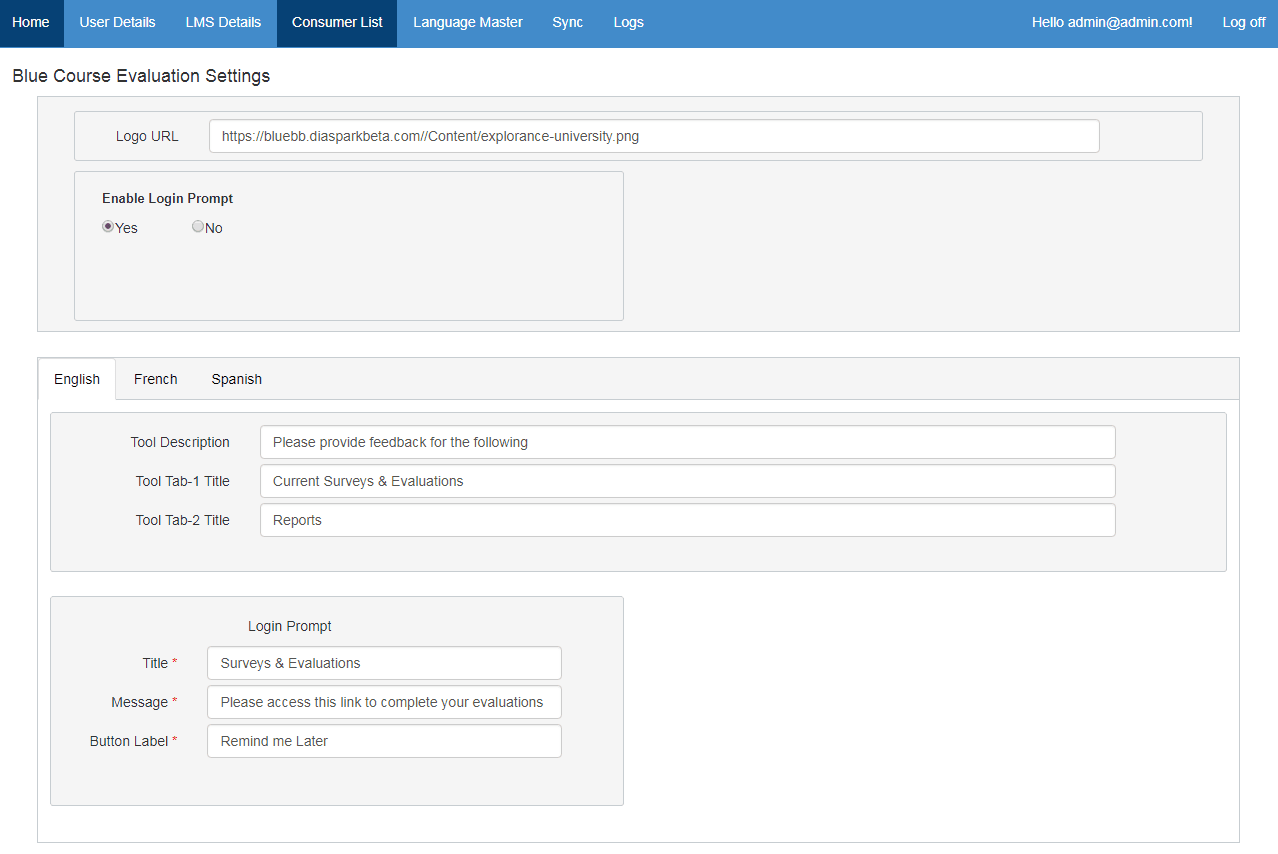
- The admin can configure the following:
- Logo URL - Configure the logo that appears on top of pop-up screens. The admin has to provide the direct URL to the logo e.g.
https://myuniversity/mylogo.png - Login Pop-up - When a student logs in, a pop-up for pending Blue tasks will be displayed. If set as enabled then enter the pop-up text in all languages selected. Below are the options available.
- Title - The header text displayed on the pop-up.
- Message - The message text displayed on the pop-up.
- Button Label - The button text displayed on the pop-up.
- Logo URL - Configure the logo that appears on top of pop-up screens. The admin has to provide the direct URL to the logo e.g.
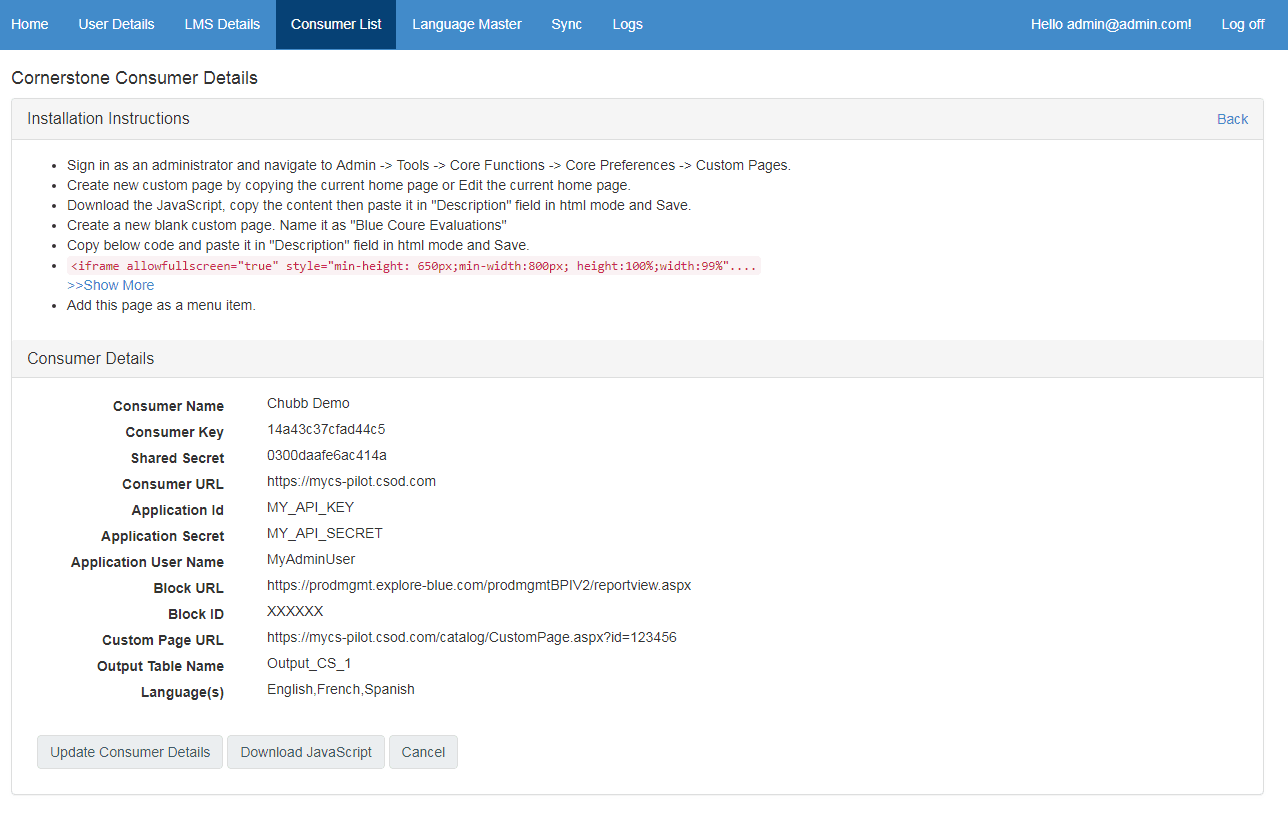
- Click Save, the following screen will appear with information regarding how to setup the LTI tool in Cornerstone. An output table will also be created in the Blue BPI database.
Step 3 - Add "Blue Course Evaluation" tool to Cornerstone custom page
Administrators add the "Blue Course Evaluation" tool to a custom page within Cornerstone. This action installs the necessary code onto the custom page, enabling users to access Blue Connector functionalities directly from their learn panel within the Cornerstone platform. This seamless integration enhances accessibility and user experience.
Procedure:
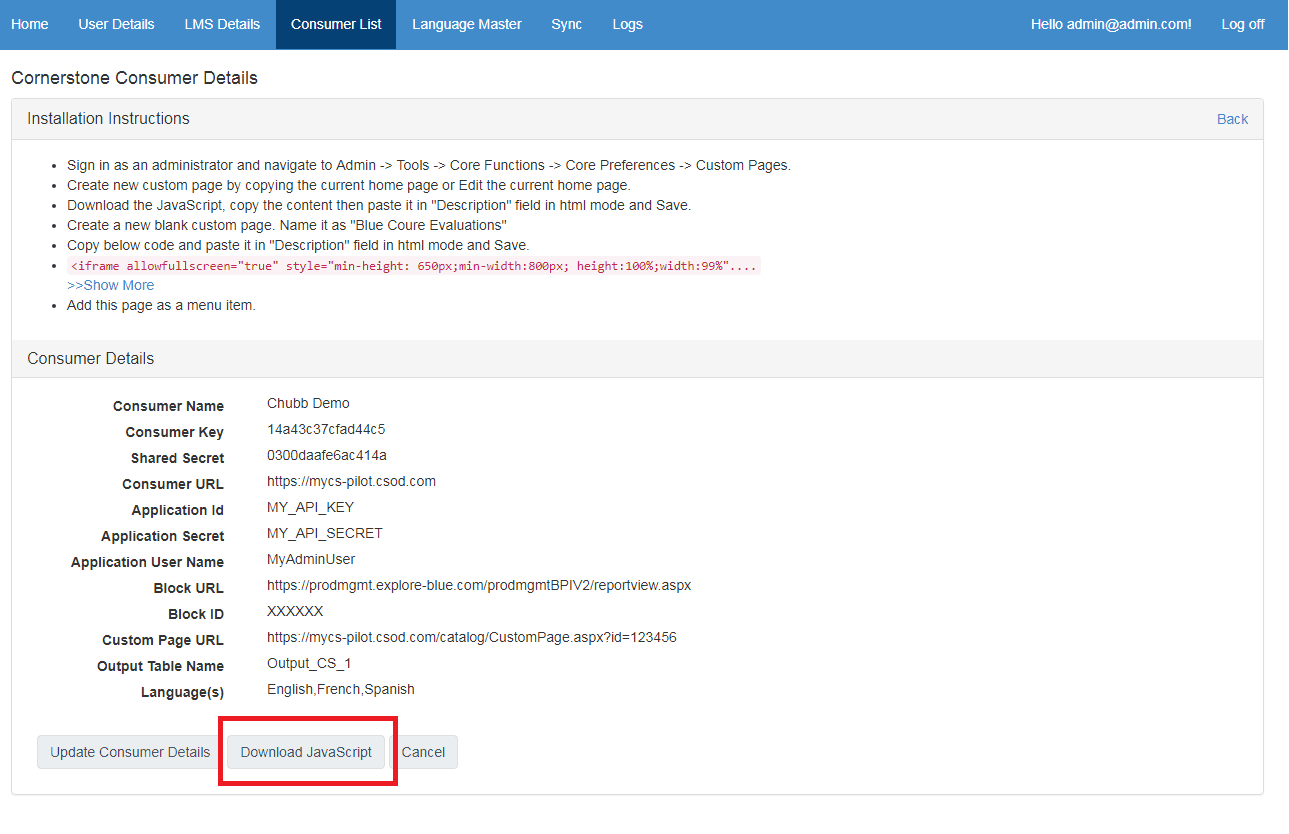
- Download the JavaScript file from Consumer Details.
- Save the iFrame code from the Blue Connector Cornerstone Consumer Details page to a text file.
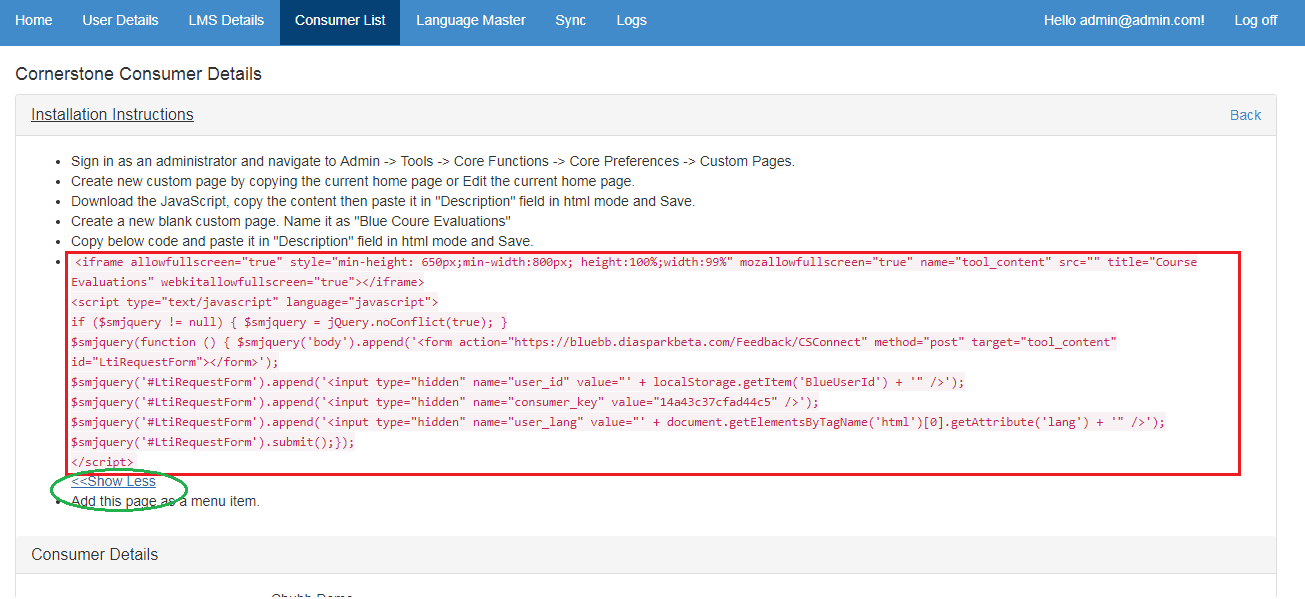
- Add the “Blue Course Evaluation” tool to Cornerstone by following the instruction on the Consumer Details screen:
- Sign in as an administrator to Cornerstoneand click on Admin - Tools.
- Select Core Functions and then Core preferences
- Select Custom pages.
- Edit the custom page created for the Blue Connector integration.
- Select Description and enable the
<>HTMLmode. - Copy the iFrame code into the HTML text box.
- Save the changes.
- Add / edit the navigation bars setting in Admin - Tools - Core Functions - Core Preferences - DISPLAY PREFERENCES - Navigation Tabs and Links to make this custom page available to users in the desired navigation menu / submenu.
Step 4 - Install the Blue Connector login prompt
Administrators install the Blue Connector login prompt within Cornerstone to streamline user interactions. This installation procedure embeds the required code, allowing Blue Connector to launch pop-ups when users log in to Cornerstone, ensuring prompt access to open evaluations.
- Go to the admin Configuration Tool section.
- Go to the Core Functions section.
- Go to the Core Preferences section.
- Select the Welcome Page section.
- Expand the Division section and select the division where the users are located (example: Headquarters)
- Select the Default Availability from this home page and click on the edit bottom from the Options section (right side).
- Go to the Description section and switch to the <>HTML option and paste the Javascript file obtained from Blue Connector.
- Click on Save and Exit.
- Scroll down from the Welcome Page section and click on Save.
The integration and configuration is now complete. The integration should still be tested to ensure all pieces are working. Testing will require help from Explorance professional services.