Edit, scan and upload forms
If required, you can make changes to your forms by downloading them as a Word file. After making the necessary changes, scan the forms and upload them back to Blue.
- Open Questionnaire - Print Forms from the project.
- Configure the following settings that are available:
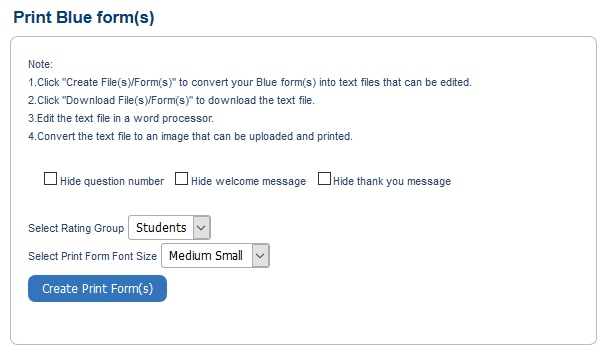
- Hide Question Number/Welcome Message/Thank You Message - These specific elements can be hidden on the print form.
- Select Rating Group - Using the drop-down menu, select for which rating group this form will be printed. If the project contains multiple rating groups, each rating group has its own separate form identified in the barcode.
- Select Print Form Font Size - Select from the drop-down menu from five (5) different font size settings. The default option is ‘Medium Small’.
- For a public survey, click Create Print Form(s) to generate the print form(s). For all other projects, click Create File(s) to generate the print form(s).
- Click the Download Form(s) link that appears. When you click on the link, a dialog box will pop-up with options to open or save the .doc file to disk.

- Open the file in your word processor, and make the necessary small changes, such as changes to titles etc.
- Make the necessary changes to the questionnaire, convert the file to a scanned image in order to upload it to Blue.
NOTE
- The image files should be in JPEG, GIF or PNG format.
- The following table gives the suggested image resolution and aspect ratio for building good quality forms:
Suggested Questionnaire Sizes
| Paper Size | Aspect Ratio | Suggested Resolution | Minimum Resolution |
|---|---|---|---|
| Letter | 1.18 | 3600*4249 | 1800*2125 |
| Note | 1.21 | 3100*3745 | 1550*1873 |
| Legal | 1.58 | 3600*5700 | 1800*2850 |
| A3 | 1.35 | 5100*6862 | 2550*3431 |
| A4 | 1.32 | 3500*4603 | 1750*2302 |
| A5 | 1.26 | 2300*2904 | 1150*1452 |
| A6 | 1.18 | 1500*1776 | 750*888 |
| B4 | 1.33 | 4200*5591 | 2100*2796 |
| B5 | 1.29 | 2900*3750 | 1450*1875 |
| Ledger | 1.49 | 4800*7137 | 2400*3568 |
You are now ready to upload the forms to Blue.
Upload forms to Blue
- Navigate to Print Forms from the questionnaire in a project.
- Use the drop-down menu to select the number of user-defined images you will be uploading.
- Click Browse... to locate each image (user-defined form) you will be uploading. When you have located all the images to upload, click Upload to upload all of them.
- Select the Paper size from the drop down list.
- Enable or disable the following options:
- Show rating group name (does not apply to public surveys)
- Hide project title in document header
- Hide subject name in document header
- Hide page number
- Use the drop-down menu to select the Rating Group for this form.
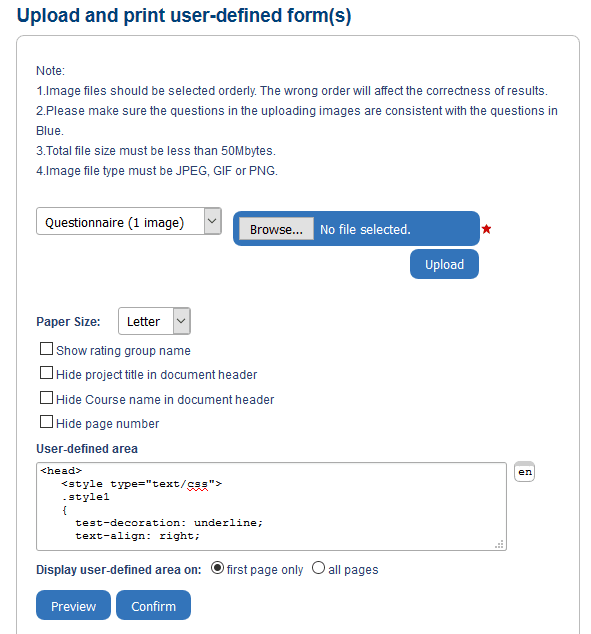
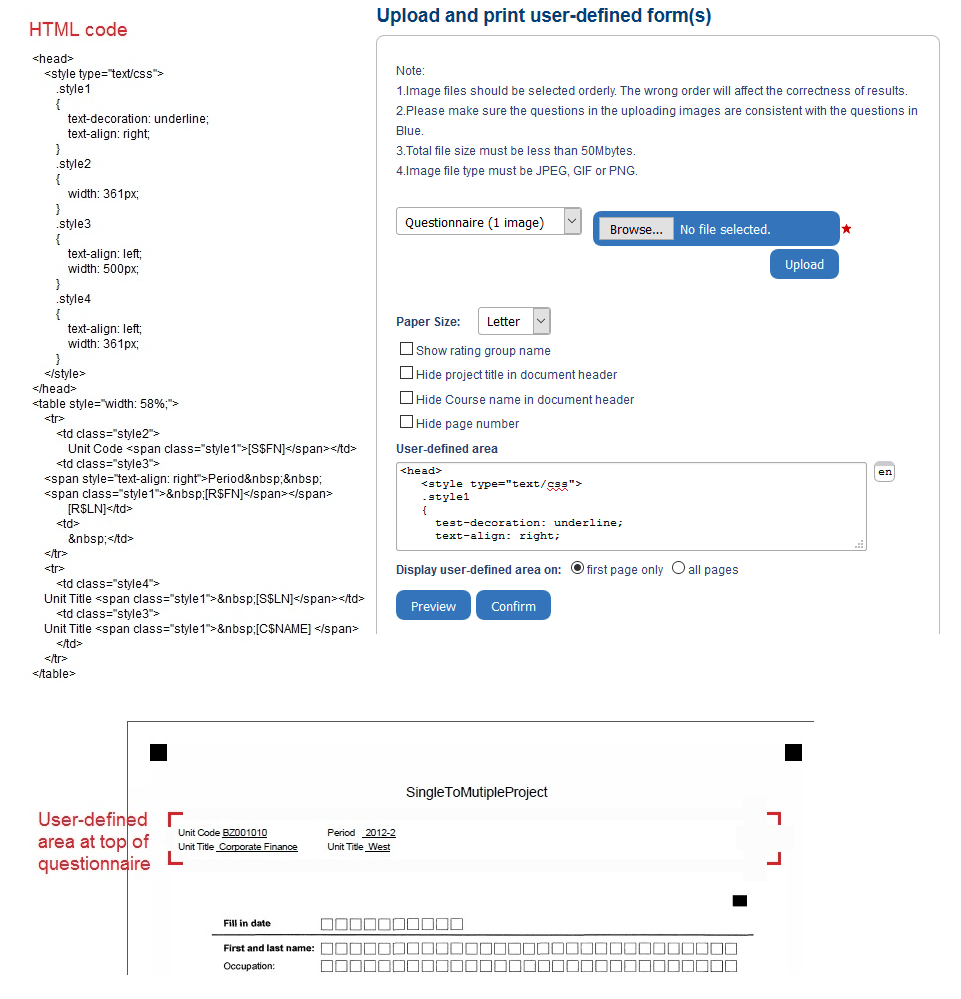
- Include HTML code in the User-defined area if you would like to customized the top of the first page or all pages of the questionnaire (see illustration below). Note that piping symbols can also be used in your HTML code.
- Click Confirm to save all the settings Blue.
You have now successfully uploaded the form(s) to Blue.
Related Articles
InResponses