Subject management (SM) task
The Subject management task allows the user to view and change who has opted out of the project, if the questionnaire will be distributed electronically or online, and the distribution timing of the questionnaire.
A common use of SM would be that the project manager can delegate evaluation management to instructors for each of their courses.
To enable SM, you must
- Determine which group will be given the task, such as instructors or department administrators.
- Ensure you have an existing relationship datasource that links the designated group to the subjects.
Opt in status, distribution medium and timing can only be modified in Subject management if the appropriate options are enabled for the project.
Subject management experience
This is an enhanced view that will allow you to see all activity related to your evaluations on a single comprehensive page. Relevant details and options are showcased for each evaluation right when you need them, such as calls to action if tasks are incomplete, viewing response rates for live evaluations, and reports for completed ones.
Subjects will appear on this page until the project they are associated with has been archived.
To access the subject management page from the Blue Home page:
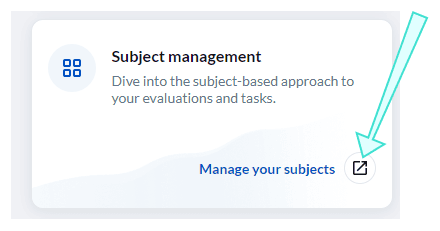
- Click the Subject Management launcher. A new page will appear where you will see all your evaluations represented as tiles.
From this page, you will be able to:
- View response rates - View real-time response rates to your live evaluation(s).
- View or manage evaluation settings - View or adjust settings to your evaluation(s).
- View reports - View individual or aggregate reports by course.
Bookmark this page for easier access in the future.
Example of subject management page in desktop view:
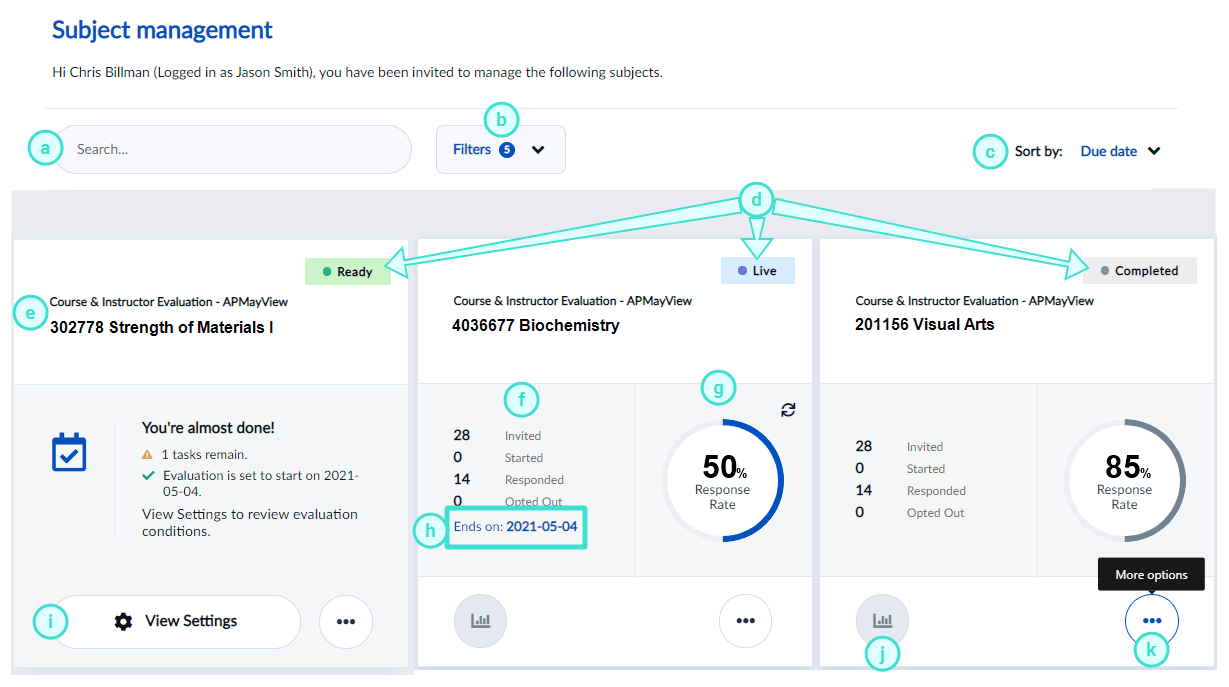
Subject management view features
- Search bar - Allows you to do a keyword search to locate specific evaluations.
- Filters - Allows you to filter evaluations displayed according to their status.
By default, evaluations with a status of Opted Out or Expired will not display unless the filter for these statuses is enabled.
- Sort by - Allows you to sort your list by due date or course name.
- Status - Indicates the evaluation status. See more on statuses.
- Evaluation - Displays the evaluation and project name.
- Participant details - Indicates the number of participants who were invited, started, responded, and opted out of the evaluation.
- Response rate - Displays the number of responses the evaluation has received.
- End date - Displays the deadline for students to complete the evaluation.
- View Settings - View settings to your evaluation. If your Blue administrator has allowed you to adjust your evaluation settings, then you may see Manage Settings instead.
- Reports - Allows you to view reports. To learn more, see Analyze your results.
- More options - Displays more options including:
- View QR code - Print or display the QR code for your evaluation to students during remote or in-class sessions to encourage participation.
- View respondents - Lists the respondents to your evaluation. From this screen you can also email all respondents that haven't completed their fillout yet.
- Download raw data - Allows you to download a CSV file containing raw response data to a completed evaluation.
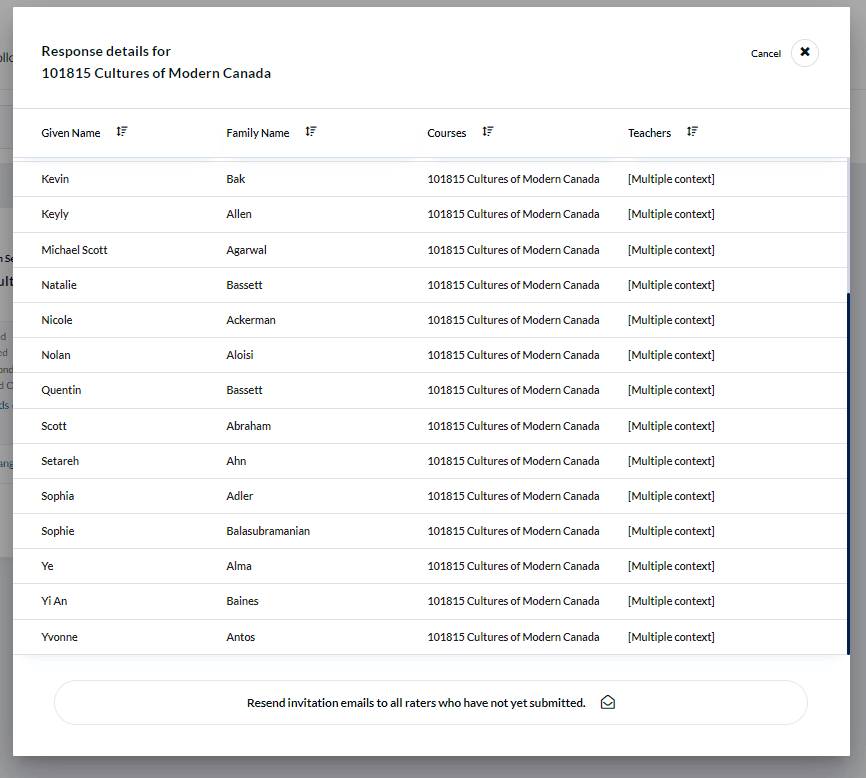
Invitation emails can only be resent if the project is live, the tasks are not expired, and invitation emails have been enabled for the task.
Example of subject management page in mobile view:

Tasks and their messaging (as they will look to the end user) should be verified by the administrator before publishing the project. This is particularly true if using the HTML editor or adding custom HTML because the HTML code may affect the layout of the task in unexpected ways and may even have an affect on accessibility.
Tile title An easy way to identify which evaluation the tile represents.
Configure the subject page
Page title The title of the page that contains the evaluation tile being managed.
Welcome message A short message underneath the page title that can contain a greeting or instructions on what task owners need to do with subject found on this page.
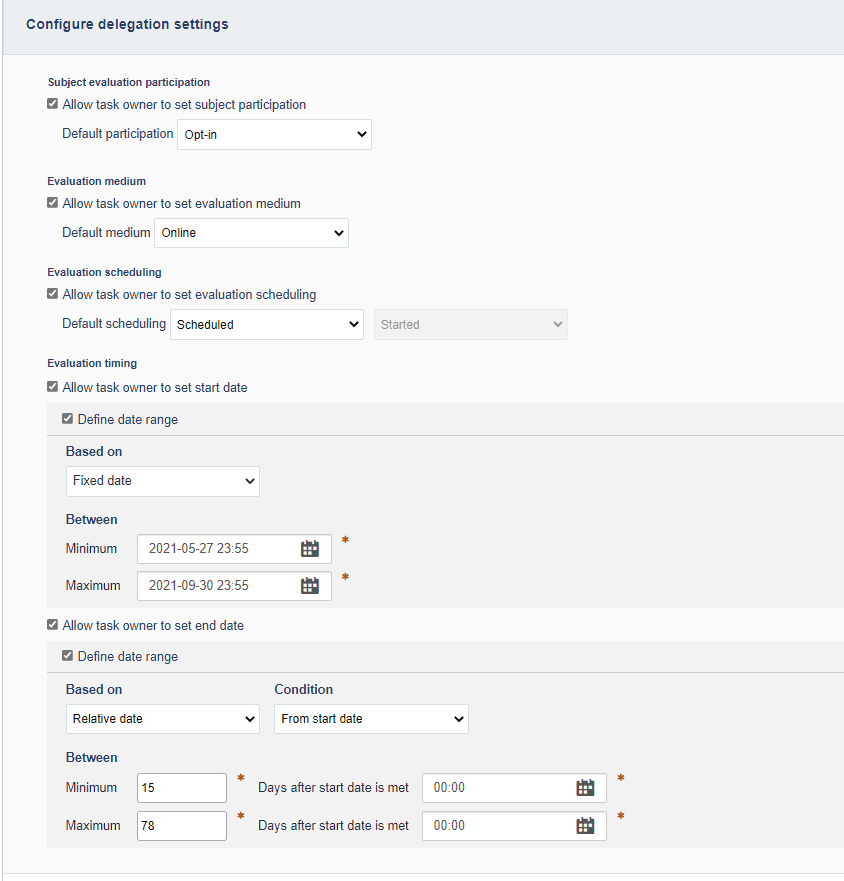
Configure delegation settings
The following options dictate the settings that Subject management task owners can modify. If none of these options are enabled, then SM task owners will only be able to view subject information.
- Subject evaluation participation - Enabling Allow task owner to set subject participation allows SM task owners to choose if the subject will be participating in the evaluation process.
- Secondary subject evaluation participation - Enabling Allow task owner to set secondary subject participation allows SM task owners to choose if the secondary subject will be participating in the evaluation process.
Once the evaluation has been started the evaluation participation cannot be modified to ensure that all respondents are presented with the same evaluation.
- Evaluation medium - Enabling Allow task owner to set evaluation medium allows SM task owners to choose if the questionnaire will be completed electronically or on paper.
- Evaluation scheduling - Enabling Allow task owner to set evaluation scheduling allows SM task owners to decide if the Fillout task will begin automatically based on its schedule or will need to be manually started and stopped.
- Evaluation timing - Enabling Allow task owner to set start date allows SM task owners to specify the start date of the fillout task. Enabling Allow task owner to set end date allows the SM task owner to specify the end date of the fillout task.
* Define date range - Enable this option to restrict the evaluation start or end date to a range of dates that you can define either based on fixed dates or relative dates.
Advanced options
Access and synchronization
Apply updated task dates to all open tasks
- When enabled, the task start and end dates for open tasks are updated automatically every time the project is saved, as well as being updated nightly when the automated updates occur. However, if the start and end dates were updated manually through task management or subject management they will not be updated automatically.
- When disabled, modifying dates for open tasks can only be performed manually through Task Management.
Task dates will be updated by the datasource for all open tasks except:
- when task dates are updated via a subject management task.
- when task dates are updated by an administrator via subject management.
- when task dates are updated by an administrator via task management.
Open tasks are all tasks except those that are completed and those that are expired.
Authentication
- Require authentication - Require users to enter their username and password to access the task.
- Include sign out link - A link allowing the user to sign out will be added to every page of the task. This feature can only be enabled when authentication is used. A sign out link will also be included on the task list that is accessible through email.
Raw data Enable the Include a link to download response data option allows the SM task owner to download the response data as a CSV file via a link on the evaluation tile.
Response details Enable the Show task and email status to allow the SM task owner to see the status of the evaluation and the status of any emails sent for each of the respondents. This option is enabled by default.
Paper evaluation settings
The Manual Print features are provided with an OCR based license. This section will not be displayed without the proper license.
Select either Blue forms or User-designed forms depending on which type of form you would like to make available to the SM task owner to print for the raters.
Choose either one file or separate files for the OCR questionnaire format.
Select the size of the text in the OCR questionnaire font size drop-down list to change the size of the font that the forms are generated with.
Impact of owner removal
Determine what should occur when the owner of a task has been removed and is no longer part of the project able to complete the task:
- No effect - if more than one user is assigned to the task, the owner will be removed but the task will continue. Anything that the user has already submitted will be preserved.
- Stop task - removing the user assigned to complete the task will result in the task being stopped even if other users have the ability to complete the task. Anything that the user already submitted will be preserved but cannot be changed or updated.
- Delete task - tasks assigned only to the user being removed will be removed as well, any tasks the user already completed will also be removed. If there is more than one user assigned to the task, the task will continue with only that user being removed.
For fillout tasks, the impact of owner removal option does affect response rates. By default, in reports, for both No effect and Stop task the invited count does not change when an owner is removed. If Delete task has been selected, the invited count is reduced when an owner is removed.
Analytics
Third Party Analytics
Blue offers native Analytics tracking and reporting for fillout tasks. Third party tools like Google Analytics are also supported and can be used in conjunction with or instead of the native Analytics offering. Enable Third Party Analytics and then paste the necessary code into the text box to begin gathering data. Follow the steps below to use Google Analytics in Blue.
Enable SM task owners to modify a subject
For more flexibility, create separate groups with different privileges. An instructor group could have SV privilege so they can only monitor their response rate and then have course admins, deans, or chairs in an SM group where they can take a decision on changing the way the subject is being evaluated, according to the settings assigned by the project manager.
To create a new SM group in a project, follow these instructions (in this example, the task is configured for instructors).
- Select the project and navigate to Definition - Group
- Select Add Group
- Group linked to - select Subject
- Group Name - enter the name of the group (e.g., Instructors)
- Link Type - select Relationship datasource
- Datasource - select the table that contains the group members’ names (e.g. Instructors)
- Relation Table - select the name of the Subject[Group] relationship table (e.g. CourseInstructor)
- Privileges - select Subject Management
- Select Create and Save Project
- Navigate to Members - Subject Members
- Use the search filters to find the members to add to the SM group
- Select the new SM group from the Select Group drop-down list
- Select Populate and Save Project
You likely already have an instructor group set to view reports (Report Viewing (RV)). In the above example, a second Instructor group is being configured to manage SM tasks. The difference between both groups is that report viewing privileges require that the Instructor group links back to its own member table, whereas SM privileges require a direct relationship with the subjects to enable evaluation controls on a per-subject basis.
SM Tasks should end when the Fillout task starts to avoid modifications while the questionnaire is running.
- Subject management supports only primary subjects in multiple secondary definitions.
- Administrators can manage individual subjects for a project even if Subject management is not enabled for the project.
- When an administrator manages a subject, that subject can no longer be managed by task owners unless an administrator chooses to Give control back to Project.
