Upload your respondents
When creating a private survey, you will need to upload a list of people you would like to complete your survey. Each survey has its own set of respondents. You can either upload a respondent file to your survey, select a contact list that can be used for multiple surveys, or manually add respondents.
Create a Respondents File (Bulk Upload)
Respondents can be imported to BlueX by uploading an Excel or CSV file. Learn how to prepare your file by following the instructions below.
Prepare the respondent data
General rules
- Every person in your file should have a valid email address.
- Every person in your file should have a unique ID.
- Other than email and ID, there are no other mandatory fields. All other data is helpful for reporting and filtering respondents.
If you plan to use an Excel spreadsheet
- Avoid empty rows in the data. In the example below, an empty row exists so the file will not be successfully uploaded.
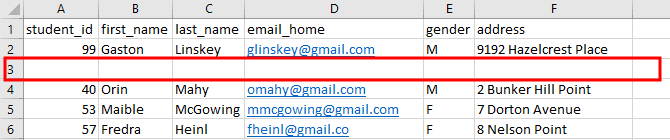
- Avoid any empty rows before the data (i.e. data must start from the A1 cell).
If you plan to use a CSV file edited from text
- Acceptable Field separator (The character used in a CSV file to separate or delimit different fields, i.e. indicate where each field begins and ends.) includes comma, tab, or semicolon; Field encloser (The character used in a CSV file to indicate where text begins and ends, it reduces the confusion when the field separator is also used as part of the text.) allows double quotes or single quotes .
- Each row should contain the same amount of fields. For example, respondent A has ten demographic fields, then respondent B should have the same ten fields.
- Always use the Field enclosure around values even if the value is unknown. In the example below, the address of the respondent is unknown, but in the CSV file we still include the quotation marks " ".

- Make the first row of the document a header row to easily identify what information is contained in each column. For example, "First name", "Department". If you do not have a header in the file with those names, you will see "Column 1" and "Column 2" in BlueX after the upload.
- Avoid applying formats in excel like font family, size, color, cell alignment, number formats like percentage or dollar sign. All the special formats will be ignored when uploading to BlueX. Merged cells will be split while only the first one keeps the value inside. Symbols in numeric cells will be truncated.
- Date columns should use one of the following formats: "YYYY-MM-DD", "MM-DD-YYYY", "DD-MM-YYYY", "YYYY/MM/DD", "MM/DD/YYYY", "DD/MM/YYYY". Other formats may not be recognized as dates.
Here is a sample excel file:

Here is a sample CSV file:

Upload the respondent file
The respondent list you upload to a private survey determines who will receive your email invitations, how many questionnaires will be generated, and what kind of respondent information can be used in the survey.
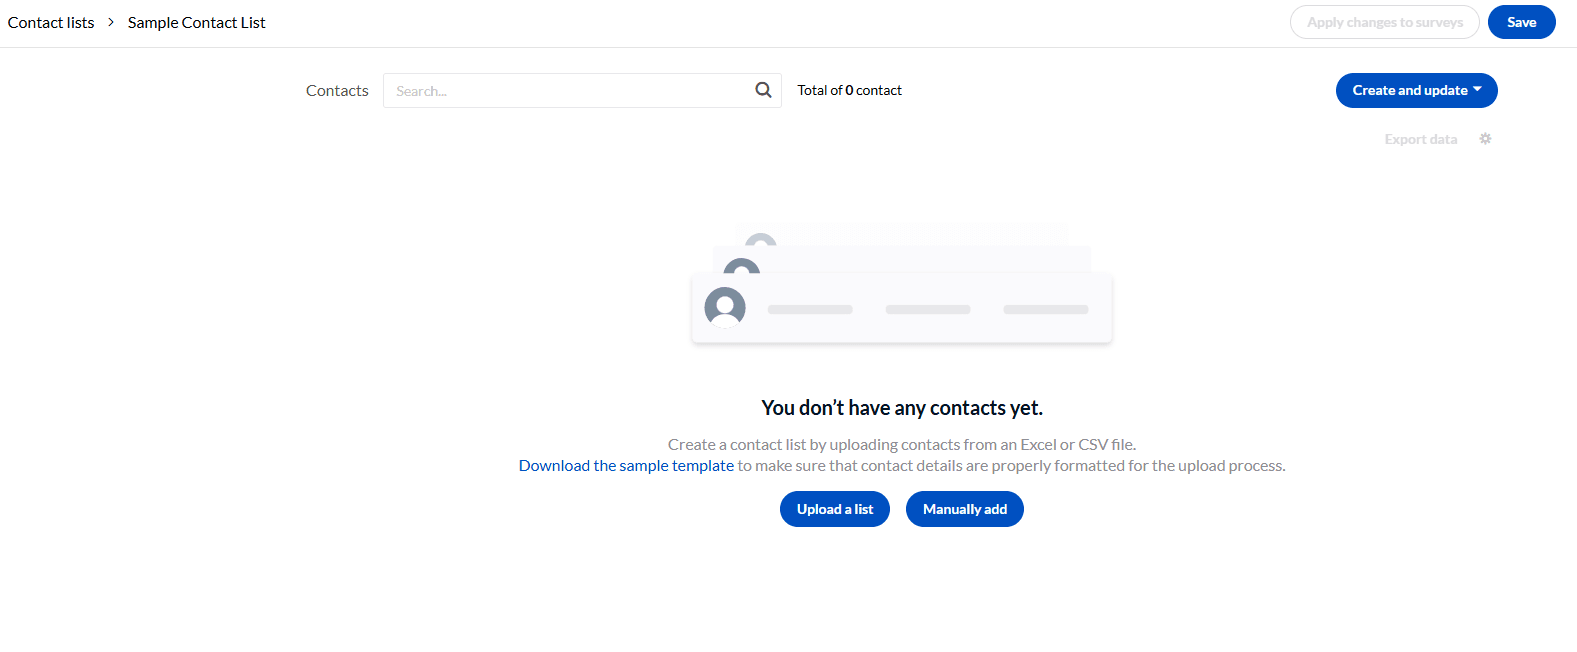
- From the survey, navigate to Respondents(
 ) - List.
 - Upload a respondent file (CSV, XLS, XLSX) by dragging it to the window, or select Browse for file... to locate the file on your device.
You can select one of your contact lists to be this survey's respondent list. Select whether the contact list should be linked or not. Review this topic for more information on linking: Create a contact list.
- Choose the appropriate Field separator (The character used in a CSV file to separate or delimit different fields, i.e. indicate where each field begins and ends.) and Field enclosure (The character used in a CSV file to indicate where text begins and ends, it reduces the confusion when the field separator is also used as part of the text.) (only for CSV files).
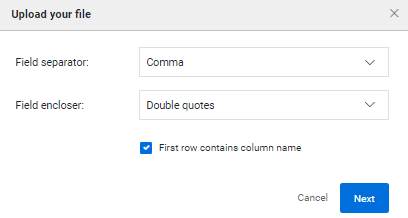
- Select Next.
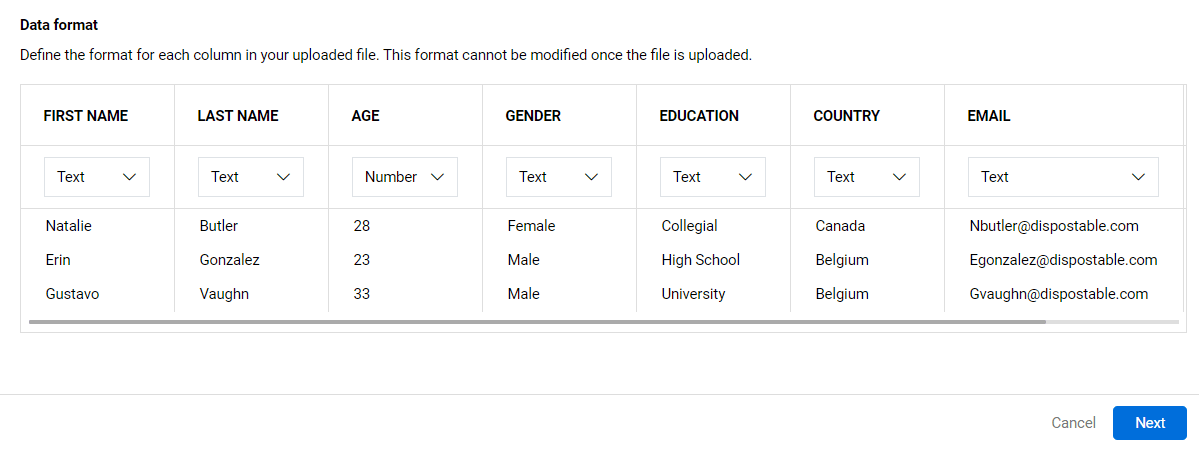
Based on the content in your file, BlueX suggest a data format for each column.
- Expand the drop down in each column to modify the data format as needed or select Next to continue.
- Assign the columns from your file to BlueX fields. This will allow BlueX to understand your content and store it properly by association.
- Unique identifier - (Required) this field is used to distinguish the respondents from each other, usually assigned to the work email address or a student ID. Do not allow duplicated or null values.
- Primary email - (Required) this will become the email campaign destination so it must be defined if you plan to conduct a private survey.
- First name and Last name
- Full name - An alternative to adding First name or Last name separately.
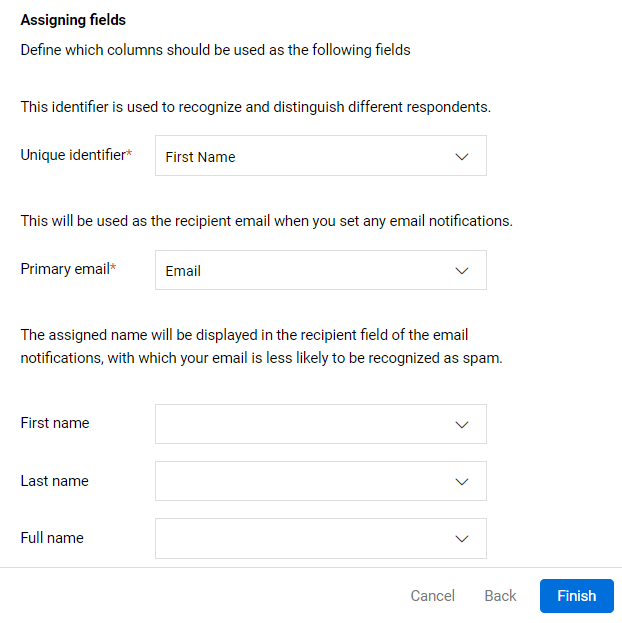
Field assignment and data format cannot be modified once you finalize the upload process. Review the settings before you hit that Finish button.
- Select Finish. All the data in your file will be transformed to a table and displayed in List.
Do not close the browser while the file is being uploaded or your upload will fail.
Upload errors?
- Only Excel or CSV files can be uploaded.
- When defining Data format, if there is a value in one column that does not match the chosen data format, you will see an error message and you will not be able to continue the process until the error is fixed.
- If the column assigned to the Unique identifier includes duplicate values for one or more respondents, the selection will be rejected. You need to select a different column that does not have any duplicated values or review your file and attempt to upload it again.
- The column assigned to the Primary email should contain a valid email address.
- Assigning data to the name fields is not mandatory, but it can reduce the chance that your email campaign is flagged as spam.
Add Respondents to your Survey Manually
You can add respondents to your survey one by one. Use this feature if you want to avoid the hassle of dealing with a spreadsheet for only a few respondents, or to add onto an existing list of contacts.
- Once respondents are added to a survey, regardless of the method (with a file or manually), select Create and update - Manually create respondents to add new respondents to your survey.
- You cannot remove demographic fields or change their types, but you can add more.
- When a survey uses a linked contact list for its respondents, you cannot manually add new respondents to the survey. Update the contact list instead; the same manual feature is available there too.
- From the survey, navigate to Respondents() - List.
- Select Manually add respondents.
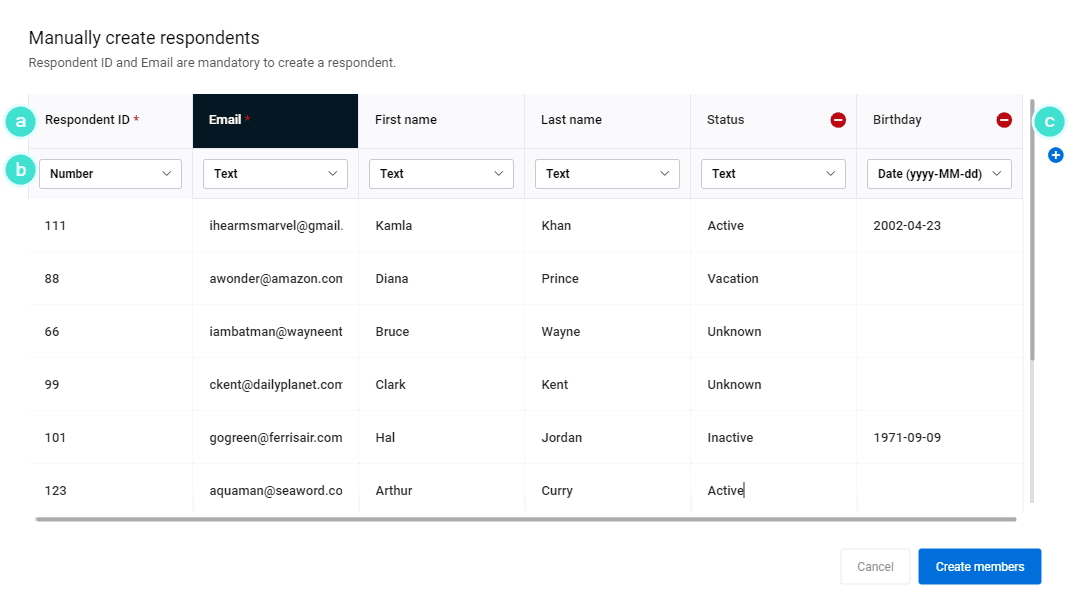
- Enter respondent data. The Respondent ID and Email address fields are mandatory for each respondent. All other demographic fields are optional.
- This row (header) determines the name of the demographic field.
- This row determines the type of value for the content entered. Choices are Text, Number, or Date. This makes sure that there's a proper validation of the field and that content, like letters in a number field, are not being added.
- Select the plus (+) icon to add demographic columns.
- Select Create members once done.
- Select Save before navigating to another section.
InRespondent Management