Copy an existing report
Copying a report can save time and ensure that it is properly configured. The step-by-step process to copy a report for:
- the same project is quite simple and only takes a limited number of steps. Refer to steps 1-12.
- a different project requires question mapping to recreate your question blocks, and several checks of the updated data provided by your datasource or DIG to ensure you have the correct courses, members and viewers listed.
The examples used to illustrate the steps will focus primarily on copying a report for end-of-term course evaluations where the feedback will be analyzed in reports shared with instructors and academic leaders.
Reports - My reports
- Login as Project Manager or Administrator.
- Navigate to Reports.
- Search for the report you'd like to copy.

- Click on the down arrow of Report Shortcuts and select Copy from the drop-down list to copy your report.

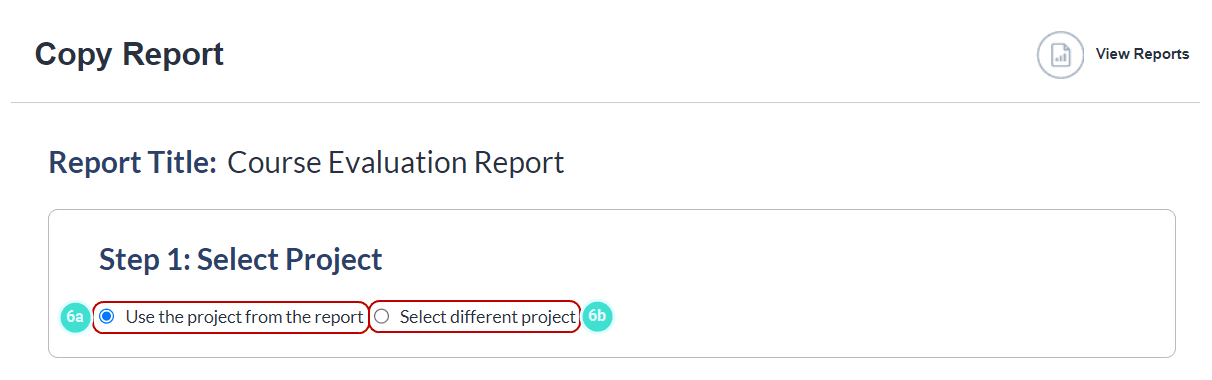
- In Step 1: Select Project to copy a report:
- for the same project select Use the project from the report
- for a different project click Select different project
- If you selected a different project, you will see a list of your projects where you can search and Select which project this copied report will be applied to.
- Validate
- Create
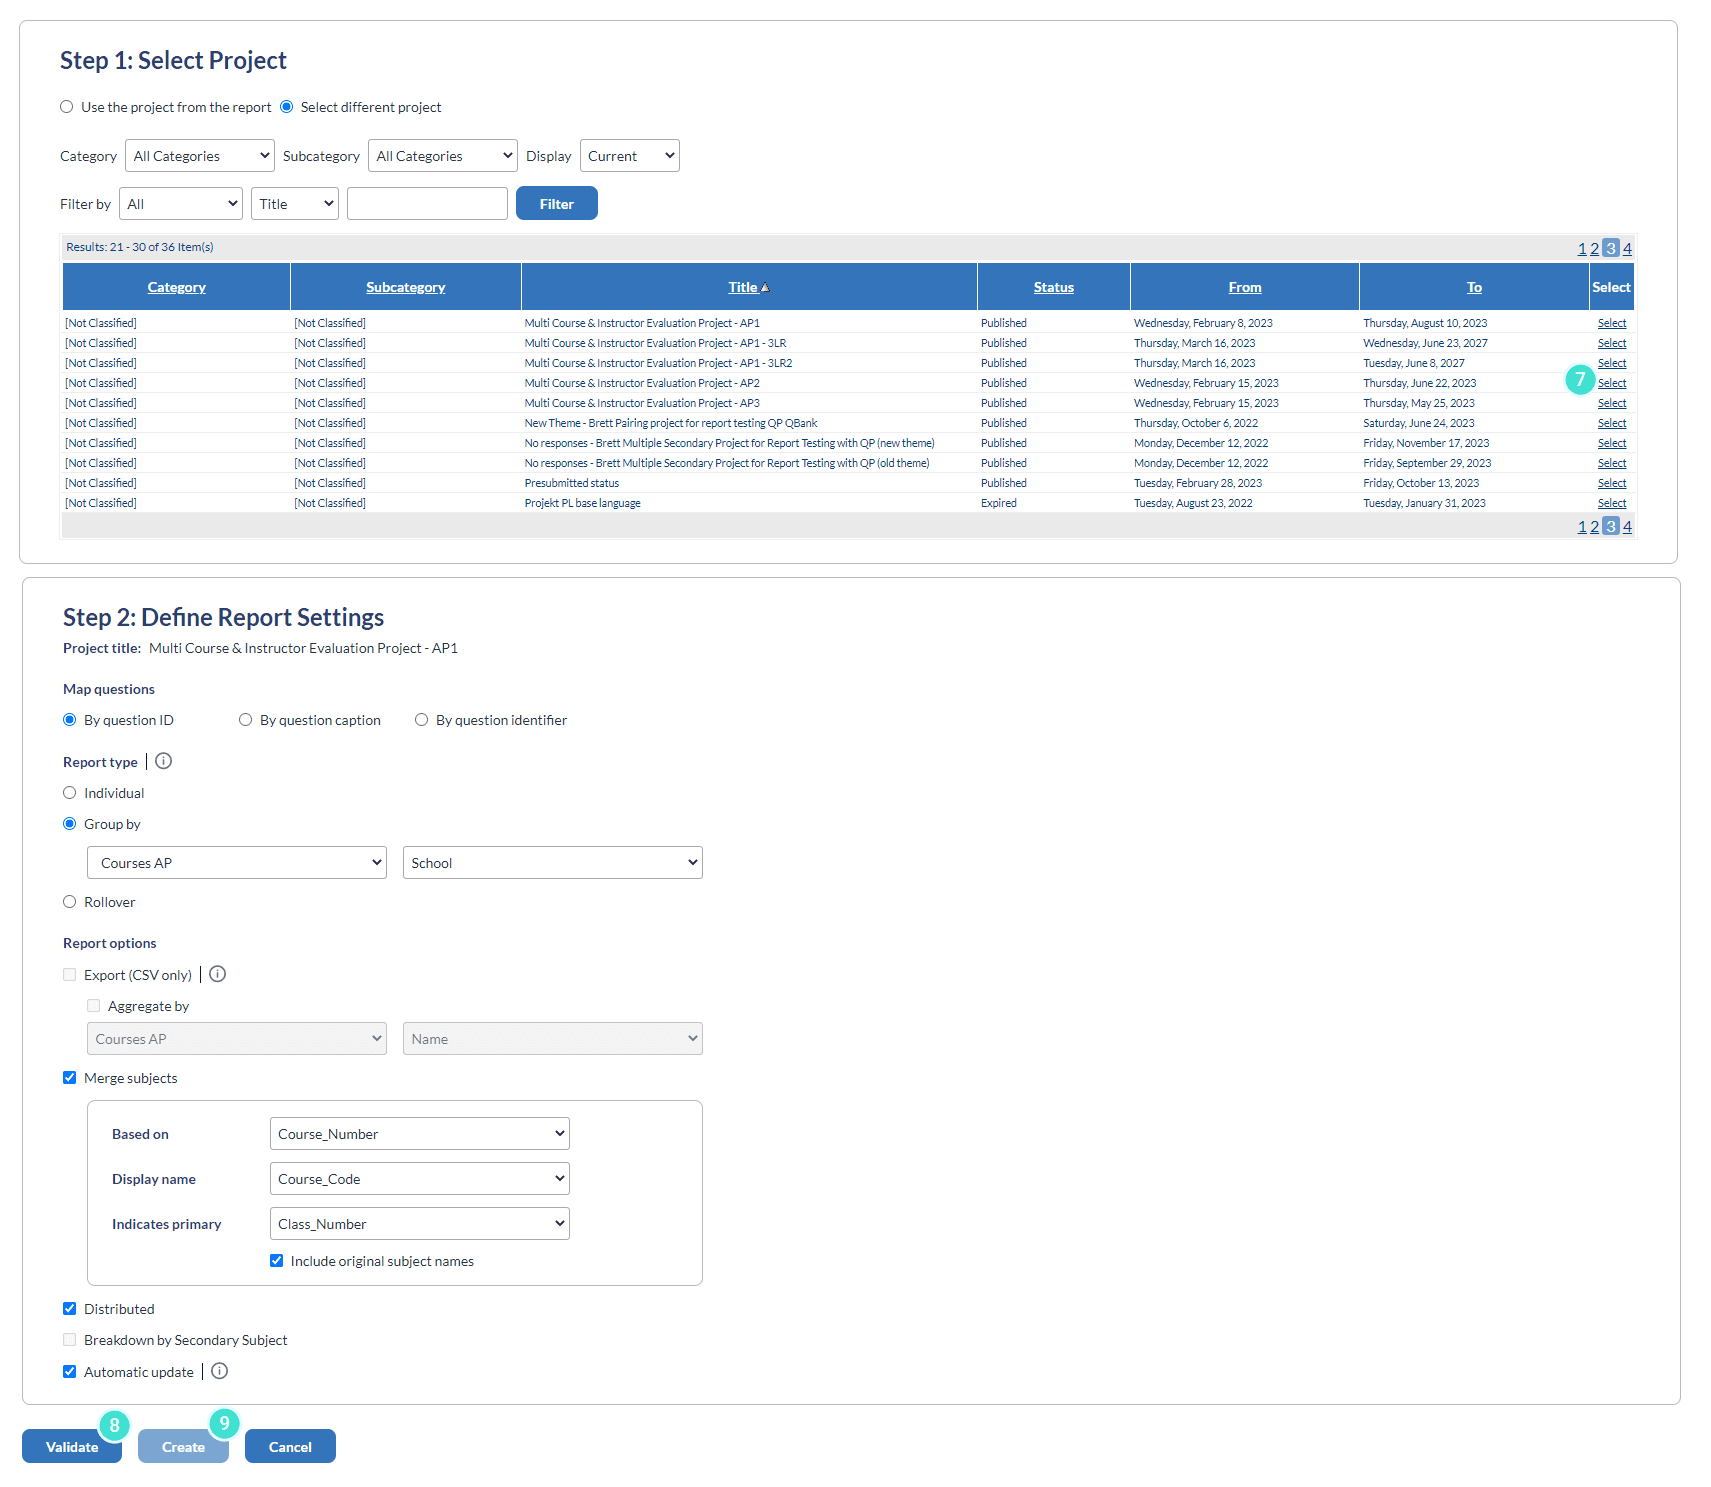
When you copy a report and apply it to another project, the report blocks will no longer be associated with questions used in the project. However, you can map questions from the original project to the new project so that the report blocks will be associated with valid questions. The recommended method to map questions is by question identifier.
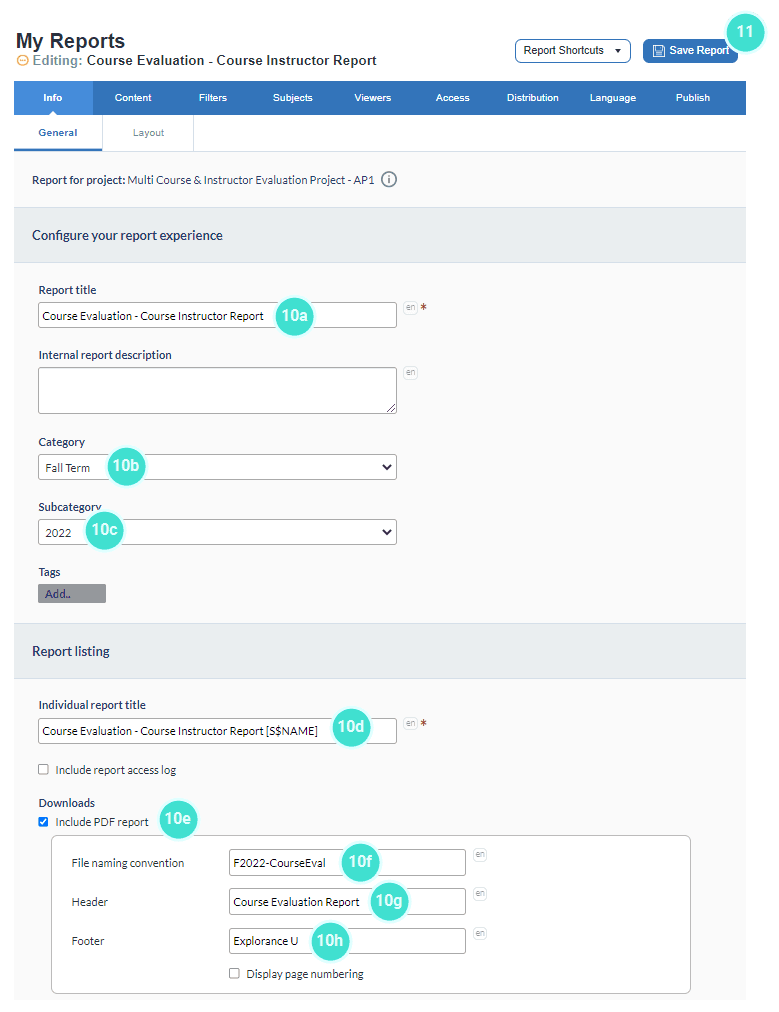
Info - General
- For each report, review and adjust the report details under the Info - GENERAL tab (as needed):
- Report Title
- Category
- Subcategory
- Individual Report Title
- Include PDF report
- File naming convention (PDF)
- Header (PDF)
- Footer (PDF)
- Save Report.
Subjects - Group Selection
- Navigate to Subjects - Group Selection and validate the number of subjects/groups, which appear in each report.
- For a instructor report, the number should match with what exists under the Subject Pairing Selection tab, in the module feedback project.
- For a module/program report, the number should match with what exists under Subject Selection tab, in the module feedback project.
- For an aggregate report, the number of groups should reflect the number of departments or faculties that you would like to report on for the current term.

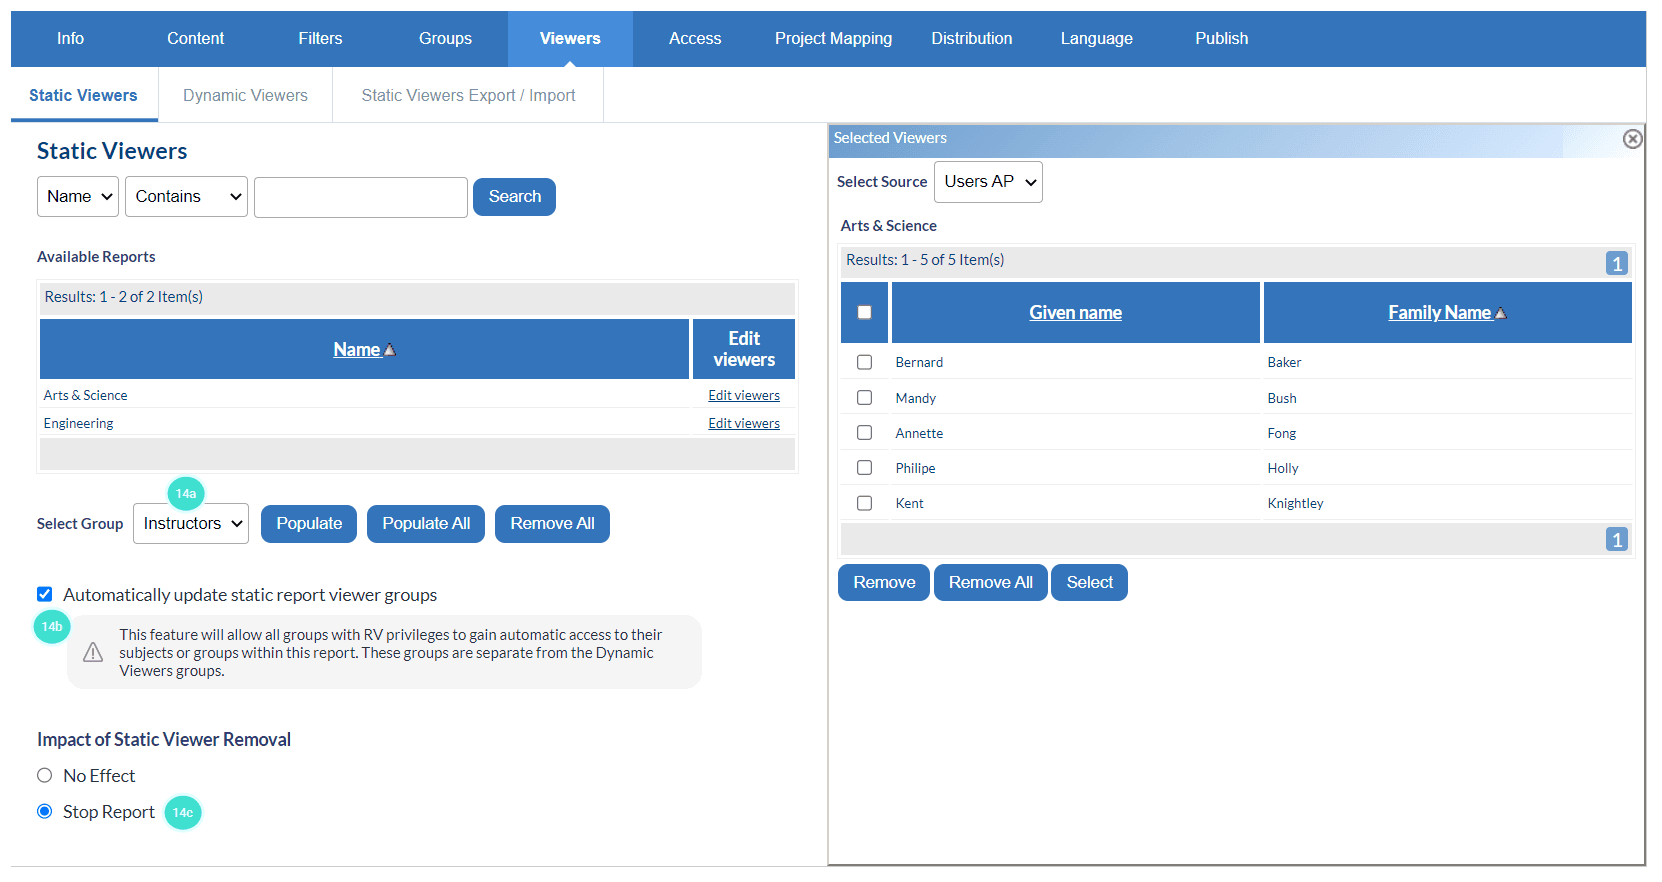
Viewers - Static Viewers
- Navigate to Viewers
- Under Static Viewers, in the Select Group drop-down, select and populate the Instructors group. Repeat for any other static viewer group related to this report (example: Module Leader SV, RV group).
Do not click on the ‘Populate All’ button. This action will introduce static report viewers that may not have permission to view individual instructor reports.
- Select any static report viewer groups that should be automatically updated - This option automatically updates the individual static report viewer groups in your report. When the “Report Viewing” privilege has been added or removed for a user in a project, the corresponding access to the report will be updated (This option is not copied from one report to the next).
- Select Stop Report for Impact of Static Viewer Removal.
Viewers - Dynamic Viewers
- For each report, under Dynamic Viewers, turn on the groups that require each report.
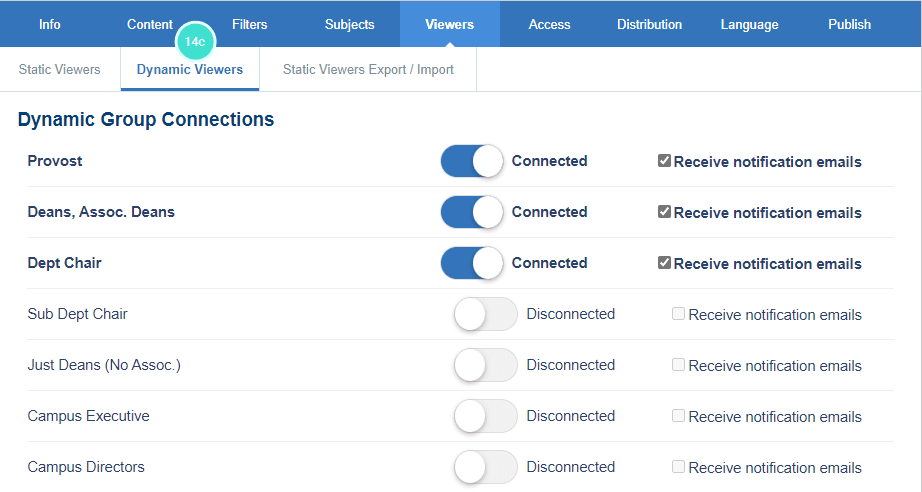
- Spot check that the right users are seeing the right reports.
- Static Viewers (Instructor Report) - Select two or three modules and click on Edit Members to validate the viewers.
- Static Viewers (Course Coordinator Reports) - Spot check two or three modules that the right Program Leaders are associated with the right modules.
- Dynamic Viewers - Spot check two or three modules that the right admins and managers (such as Provost, Deans, Department Chairs) are associated with the right modules.
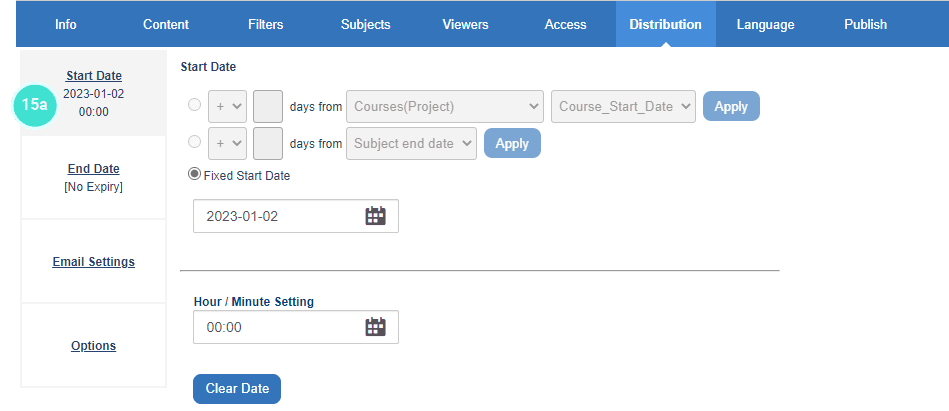
Distribution
- Navigate to Distribution and check the following:
- Start date (set the date when you would like to release reports).
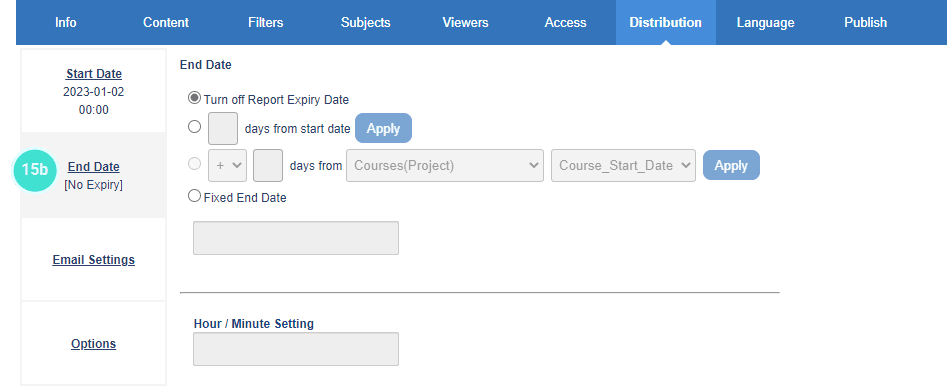
- End date (Turn off Report Expiry Date). This is a recommended and not a mandatory setting so that reports will be able for historical and comparative purposes.
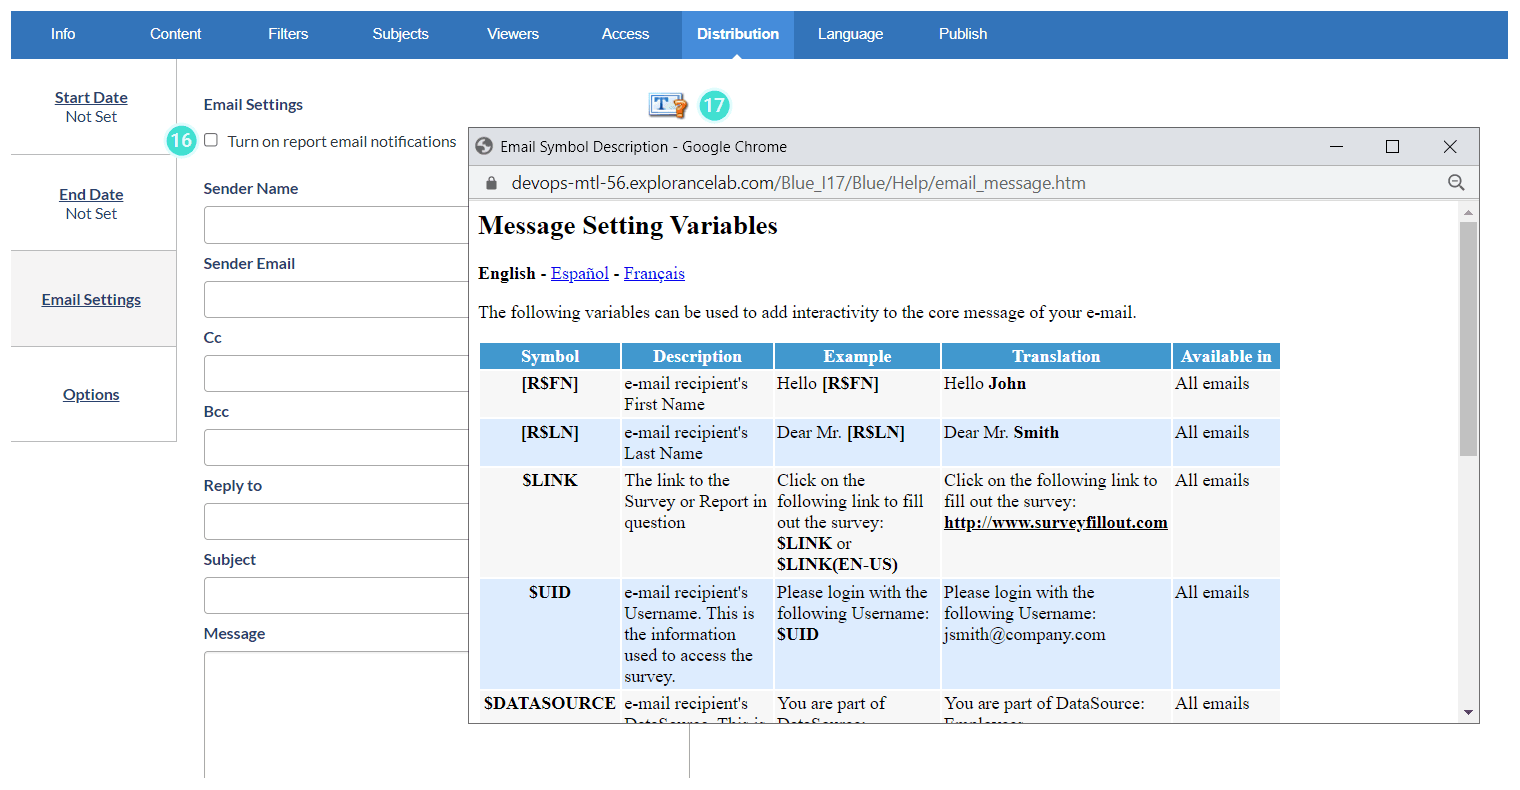
- Email settings - Turn on report email notifications should be unchecked.
- Review the email messaging. If changes are required, use the Message Setting Variables pop-up to quickly find the variable needed for your message.
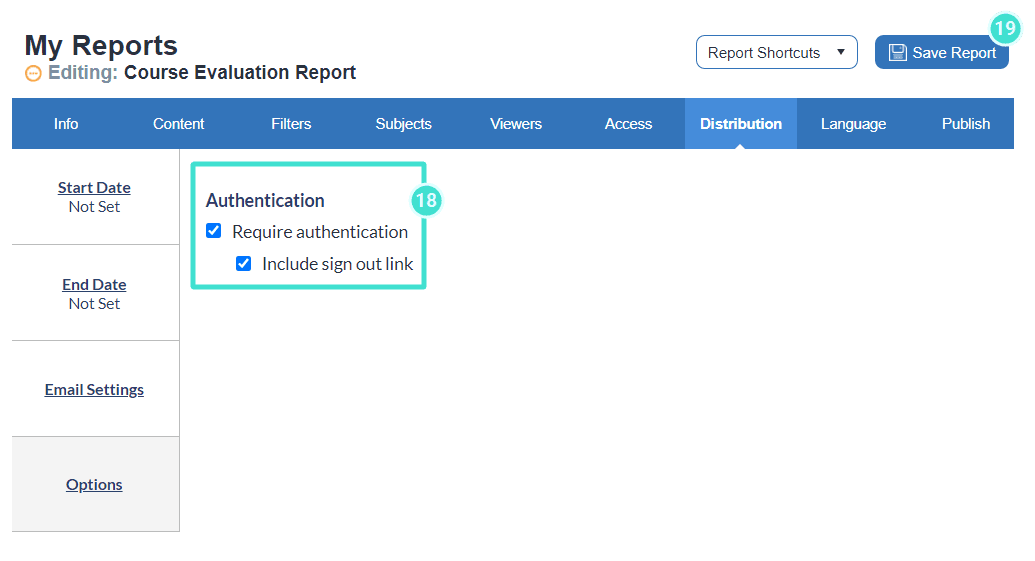
- In Options, Require authentication should be checked
- Save Report.
Publish
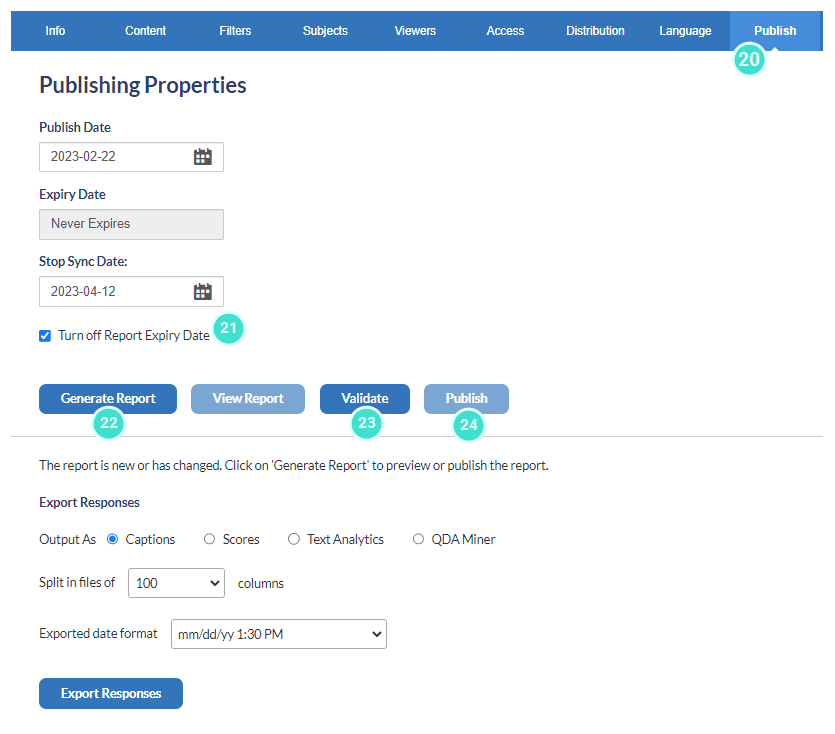
- Navigate to Publish.
- In Publishing Properties, the Turn off Report Expiry Date option should be checked.
- Generate Report and review each section.
- If no changes are required, Validate your report.
- Then Publish your report.
- To release emails:
- Review one last time the email messaging (under the Distribution tab, Email Settings and check Turn on Report Email Notifications).
- Save Report (emails will go out to the selected viewers).
InResponses