Publish a report
The act of publishing a report finalizes how and which data is reported and releases the report to it's viewing audience. The act of publishing may generate notification emails, task assignments and custom links. Set options for including the raw response date (include CSV option), publishing PDF versions, and exporting responses.
The project must be published before the report can be published.
To publish a report follow these steps
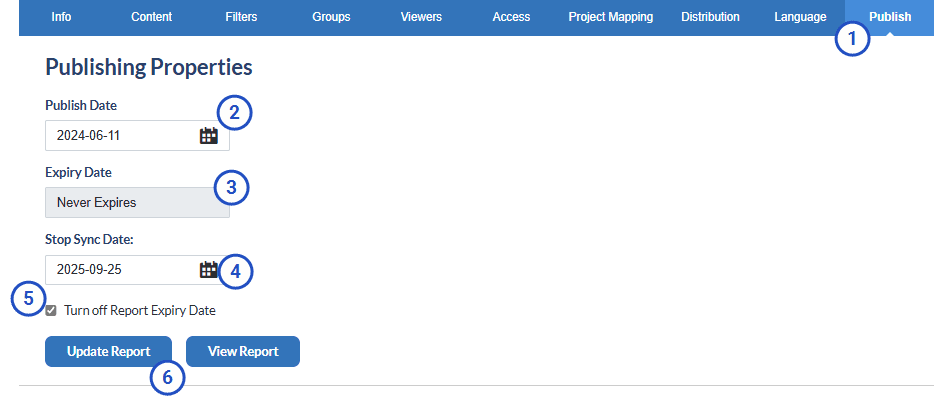
- Open a report and navigate to the Publish page.
- Set a Publish Date for the report. This is the earliest date that the parent report will first become available. Report viewers will only be able to see the child reports based upon their assigned distribution period.
- Set an Expiry Date (optional). This is the date that the report is no longer accessible to report viewers.
- Set the Stop Sync Date (optional). This option is only available if automatic updating of report content for viewers is enabled (established when creating the report framework). By default the report will automatically stop syncing data 90 days after the report expiry date.
- Reports are updated daily at 2:00 a.m.
- Updating the report also updates the report distribution dates.
- Updating the report also updates the report subjects.
- Select Turn off Report Expiry Date if the report can remain available indefinitely. Selecting this option disables the Expiry Date.
- Generate/Update the report to compile the latest data according to the report configuration.
Depending upon the size and complexity, as well as the capabilities of the server, generating a report may take a few minutes to a few hours, but other tasks can continue to be performed while the report is generating.
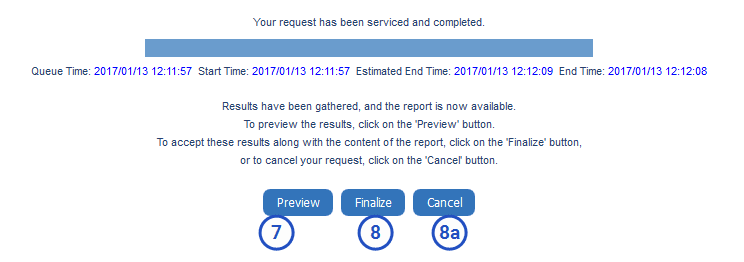
- Preview the report once the Generate Complete window appears.
- Select Finalize if the report generated as expected and return to the Reports - Publish page.
- Select Cancel if the report needs to be modified. Choosing cancel discards the generated report and returns to the Reports - Publish page.
- Select Cancel if the report needs to be modified. Choosing cancel discards the generated report and returns to the Reports - Publish page.
All errors must be resolved before a report can be published.
- Validate the report. Resolve any errors and review any warnings that Blue identifies.
- Publish the report once all errors have been corrected and the generated report has been checked. Once a report is published email notifications will be sent out and reports will appear on the dashboards of report viewers according to the distribution options.
- Finalize the report.
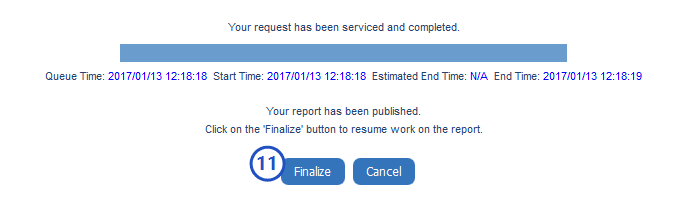
- Update Report after the report has been published and new responses have been received or changes to the report have taken place.
- Finalize the report after it has completed updating to make the newest version available to report viewers.
- View Report to open a new browser window displaying either the actual report in the case of a Rollover report, or a report list containing all of the Individual or Group by reports that have been generated.
Export responses and Report access log
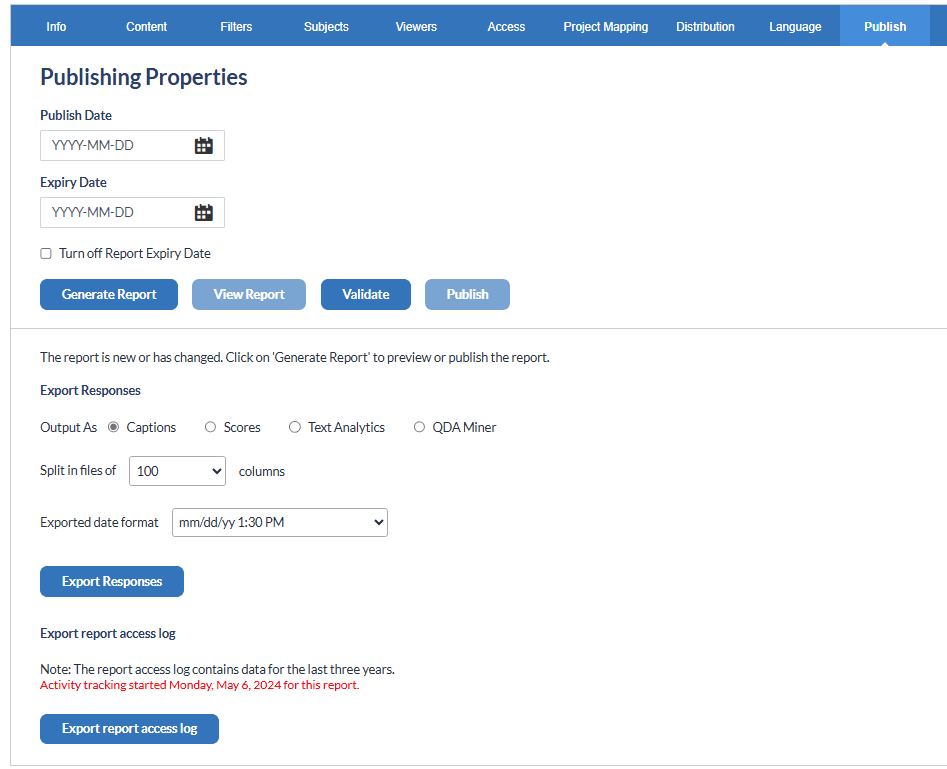
If needed, select how the response data should be exported. For more information, see Export responses for use outside Blue.
Export report access log - The report access log is only available to the administrator. This log contains a record of all users who have viewed this report for the last three years. This log is always on for every report and tracks who the report was distributed to, who viewed the report, when they viewed the report, and how they viewed the report.