Question personalization (QP) task
The Question personalization task assigns the group with Question Personalization privileges the task of customizing the questionnaire for a particular subject by either selecting predefined questions created by the project administrator (Selectable questions) or by creating their own questions to replace placeholders inserted by the project administrator (Personalized questions).
Click here to access a Question personalization tutorial video which introduces end users to QP features showing them how to navigate the interface and make their selections.
Question personalization experience
Question personalization allows you to add your own questions to a survey. You can access the Question Personalization page by selecting:
- A direct notification (email or SMS) that was provided to you.
- A question personalization task from your LMS, Blue Home, or Subject Management page.
Question personalization overview
On your Question Personalization page, you may see two types of questions to add to your evaluation:
- Customizable
- A type of question you can write in your own words to tailor towards your course and students.
- Selectable
- A type of question you can choose from a list.
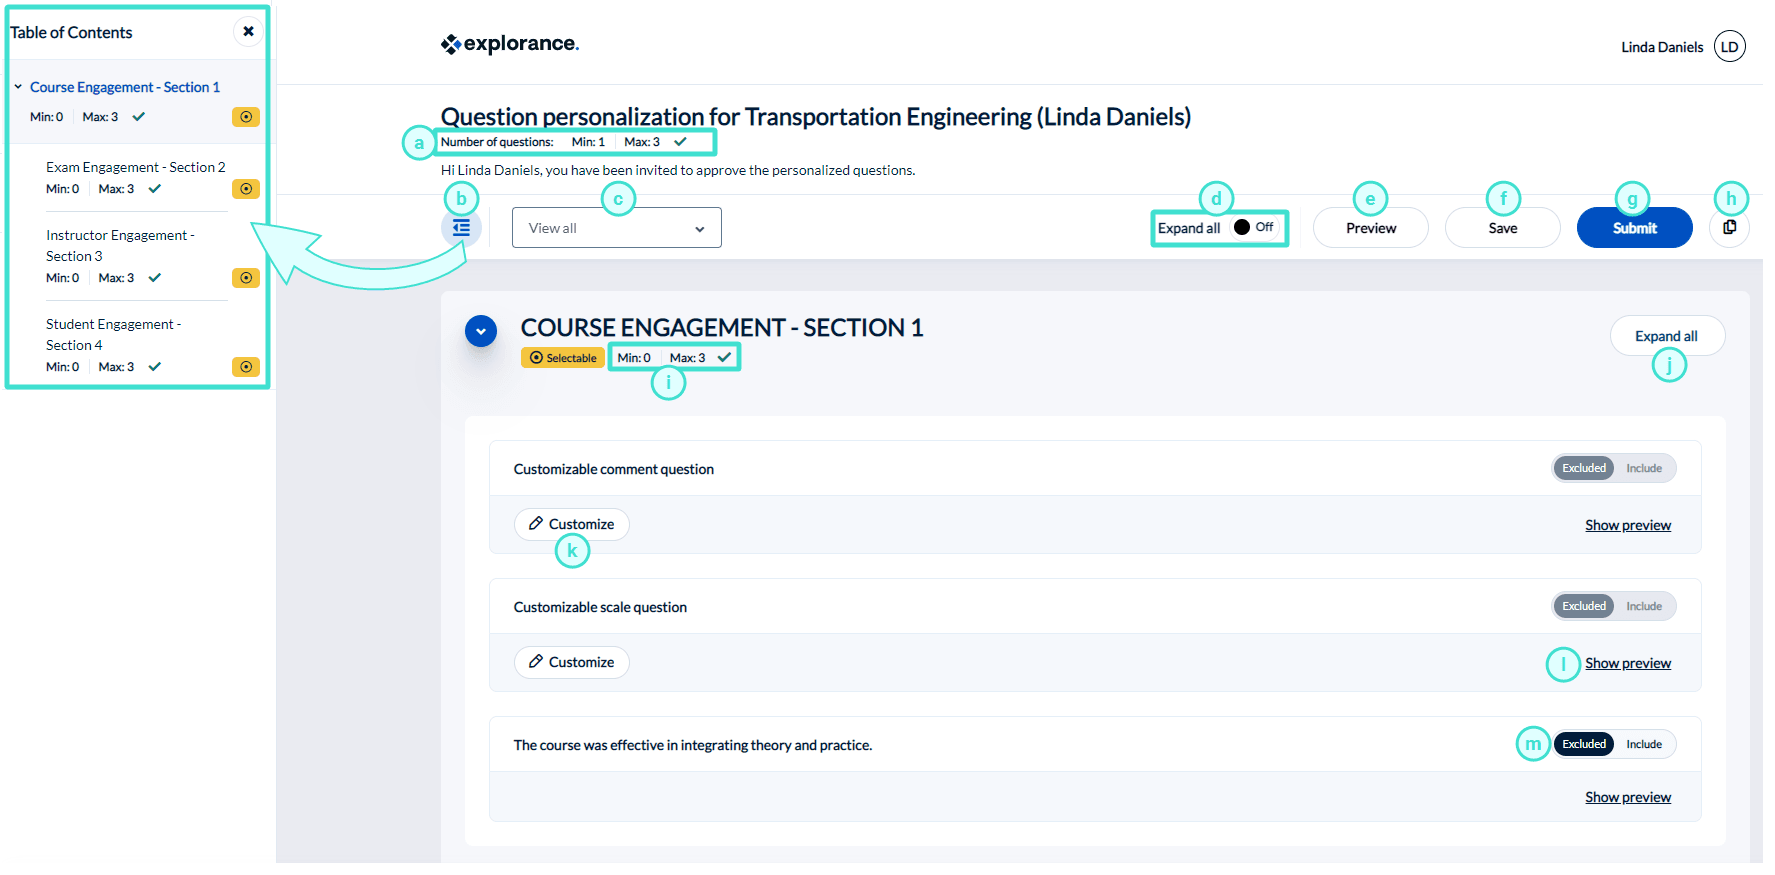
Question personalization menu features
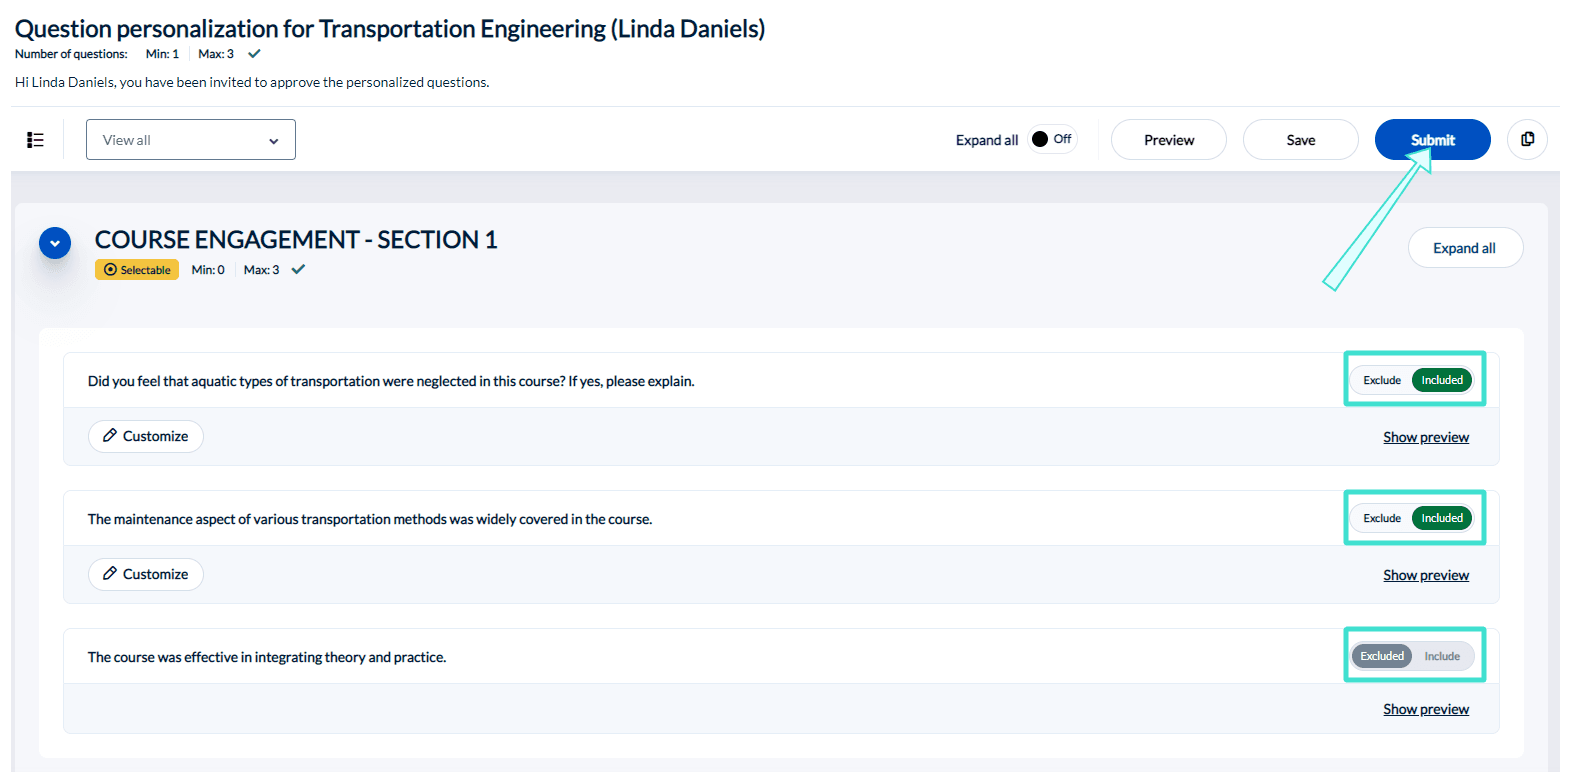
- Number of questions condition - Displays the minimum and maximum number of personalized questions allowed for selection. A green check mark means the global conditions have been satisfied.
- Table of contents - Provides a simplified overview of question sections you can personalize. The page will automatically scroll to the question section you selected.
- Filter - Filters the list of questions displayed.
- View All - All available questions.
- Selectable - Only questions that can be selected.
- Customizable - Only personalized questions that can be modified.
- Included - Only questions that have been chosen to be included in the questionnaire.
- Excluded - Only questions that have been chosen to be excluded from the questionnaire.
- Expand all - Allows you to expand or collapse all question previews for all sections in the questionnaire.
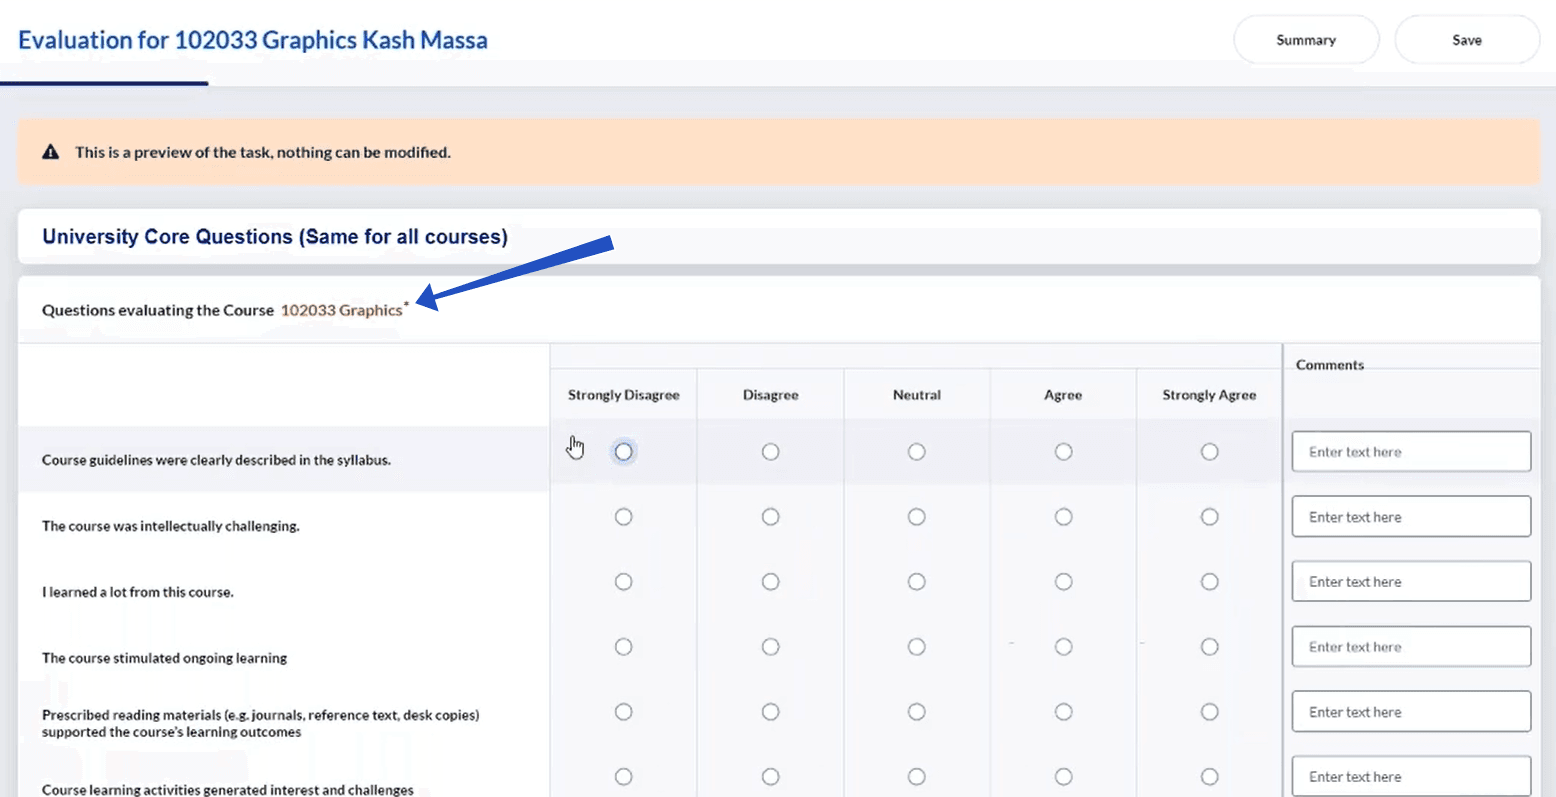
- Preview - Allows you to preview a sample of your evaluation from the perspective of your students. Make sure to save your changes before using the preview function.
- Save - Saves your changes on the page without submitting.
- Submit - Submits your personalized questions to be included in the evaluation.
- Copy options - Allows you to copy selections and personalized questions to or from another course. To learn more, see Copy questions between your courses.
- Number of questions condition - Displays the minimum and maximum number of personalized questions allowed in the specific section. A green check mark means the section conditions have been satisfied.
- Expand all - Allows you to expand or collapse all question previews for a specific section in the questionnaire.
- Customize - Allows you to customize the question.
- Show preview - Allows you to preview a sample response of the question.
- Include/ Exclude - Allows you to include or exclude a question from the evaluation.
You may see customizable questions in your evaluation:
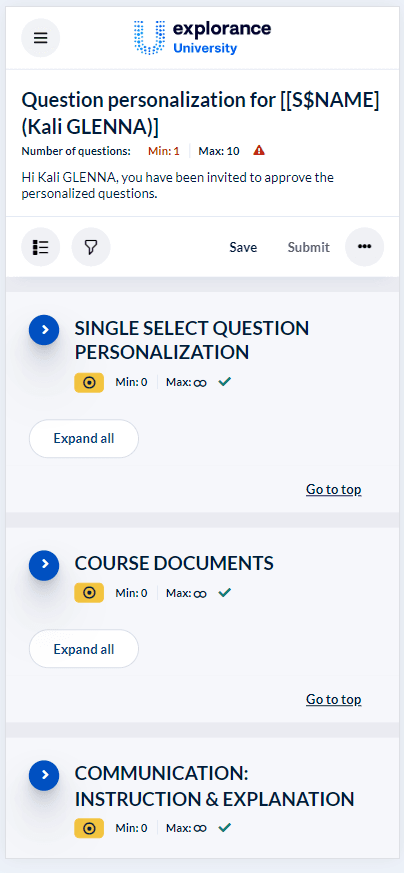
Example of Question Personalization page in mobile view:
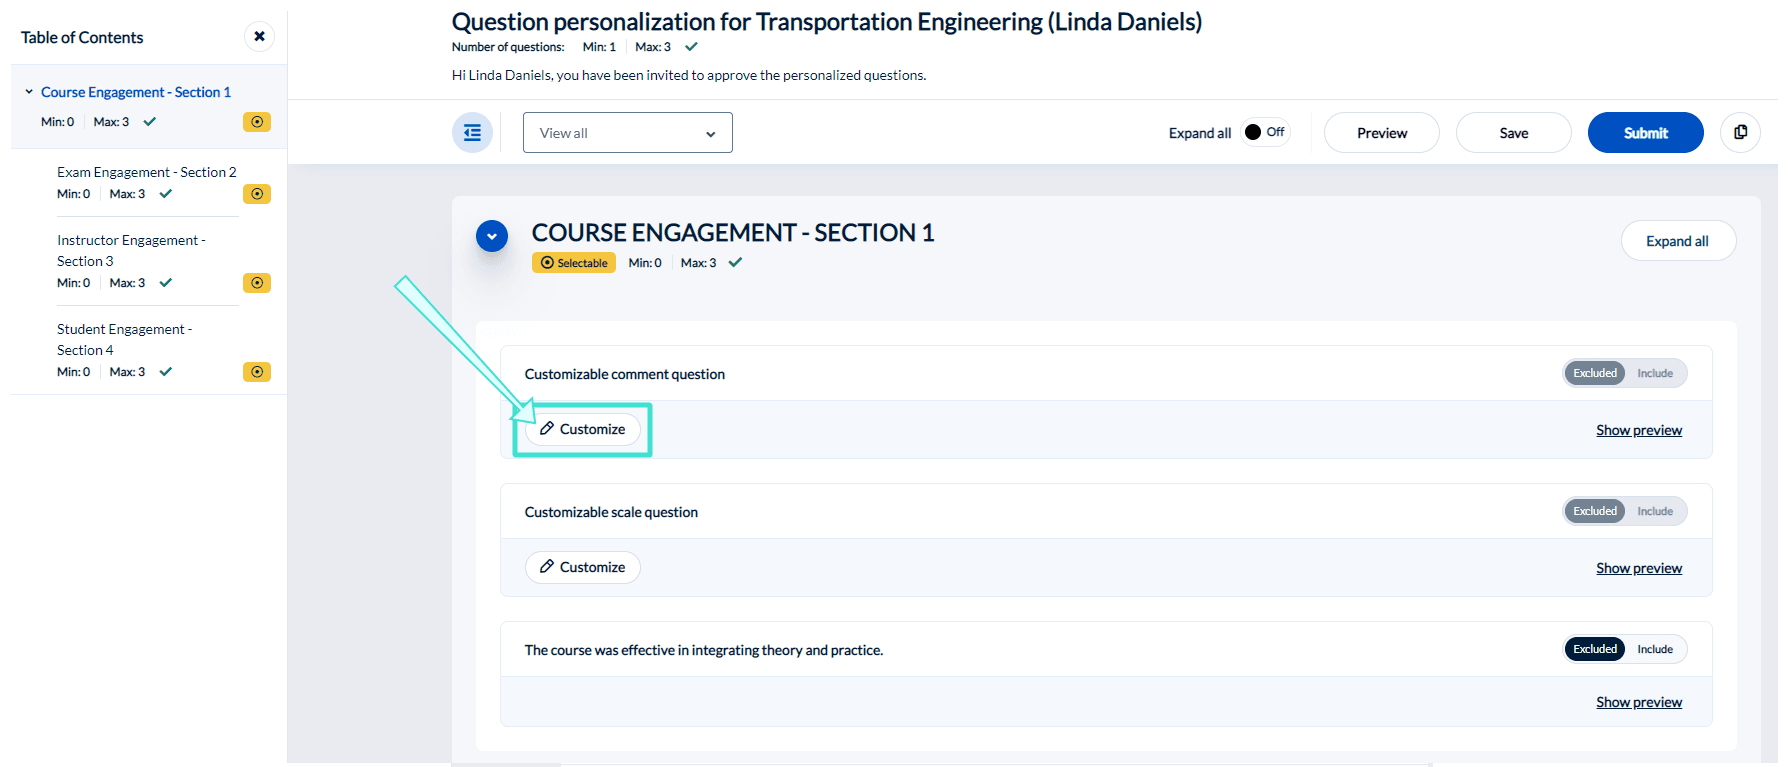
- Click customize next to a question you wish to modify. You will be directed to the question editor.
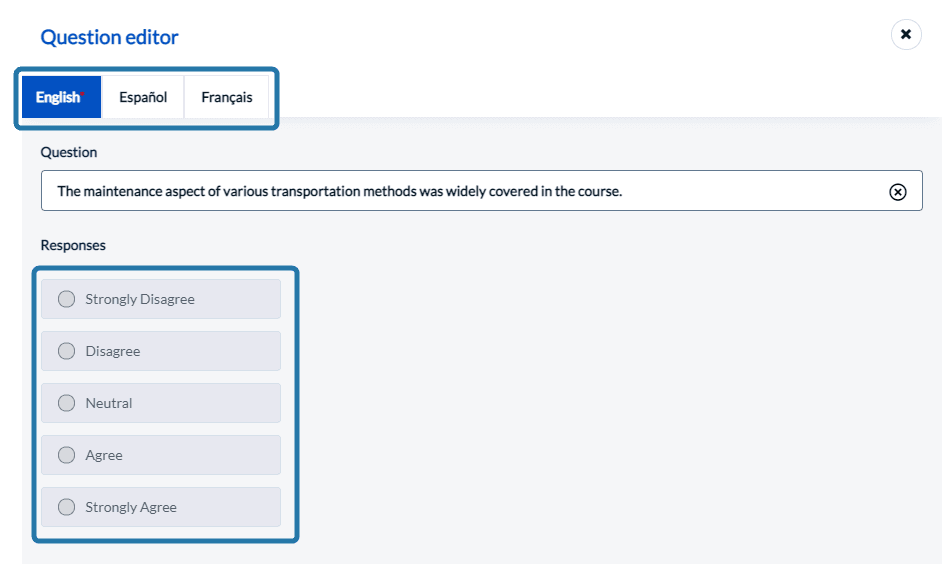
The type of response for a customizable question cannot be modified. For example, you cannot change a question with a comment response to one with a multiple choice response.
- Input the title you wish to give to your question. Keep in mind that the question's title must support the type of response (comment, multiple selection, etc.) so that students can easily provide feedback.
You may be able to provide your survey questions in different languages by switching between tabs. The survey's base language is represented with a red asterisk, and if you leave a language blank, it will automatically use the base language's question text in it's place.
Once you have customized a question, it will automatically be included in your evaluation. You can choose to include or exclude questions by toggling the include/ exclude button next to them.
- Choose the questions (customizable and selectable) you wish to include in your evaluation.
- Click Submit when you are done.
Personalizing the questions
To personalize a question, click Customize beside the question and enter the question. The question will be automatically included in the questionnaire, but it can be manually deselected. The type of question and potential list of answers cannot be modified.
Expand all
When enabled, the preview for all question and answers for all sections are expanded showing all previews. Further, each section also contains a Collapse all or Expand all button that will display all previews for all questions and answers for that section.
Preview the questionnaire
Preview questionnaire works the same as Form preview. It displays the entire questionnaire, including personalized questions, but triggers and piping are not available, and responses are not stored. Any changes made to the personalized questions must be saved before they are reflected in the preview.
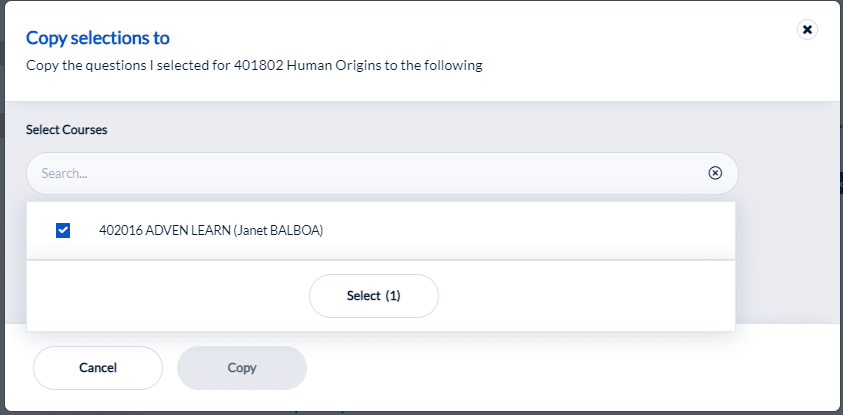
Copy to and copy from
Copy the selected questions from another question personalization task that was part of a previous project or copy the selected questions from this subject to another subject in the same project.
If a secondary subject (for example, an instructor) has more than one question personalization task to complete, the questions for one task can be copied to the other tasks. Click on the Copy button, select Copy selections to, then select the additional subjects and click Copy.
In order for questions to be copied from a previous project to a current project, the following three conditions must be true
- the question identifiers must match
- the task owner must be the same
- the definition of the projects must be the same
If a secondary subject (for example, an instructor) has been involved in previous projects, the user may be able to copy question selections from a previous project to the current project, if the administrator has connected a previous project. Click on the Copy button, select Copy selections from, then select the previous subject and click Copy.
Question personalization preview
Question Personalization Preview supports the following:
- Triggers for primary and secondary subject conditions.
- Triggers for question conditions.
- Triggers for rater group conditions.
- Triggers for secondary subject relational conditions if the Secondary Subject Selection question type is used (and not hidden).
Question personalization preview does not support:
- Rater Field triggers will not be applied (reason: the user is unknown).
- Rater demographic piping is not supported.
If you wish to allow instructors to view only their QP questions, you may add a Rater Group trigger for specific questions to filter them out of the QP task. Previewing the student fillout task from the QP task will display each question’s default mandatory status and allow you to see all questions in the questionnaire. To learn more about creating triggers for a project, see Create triggers.
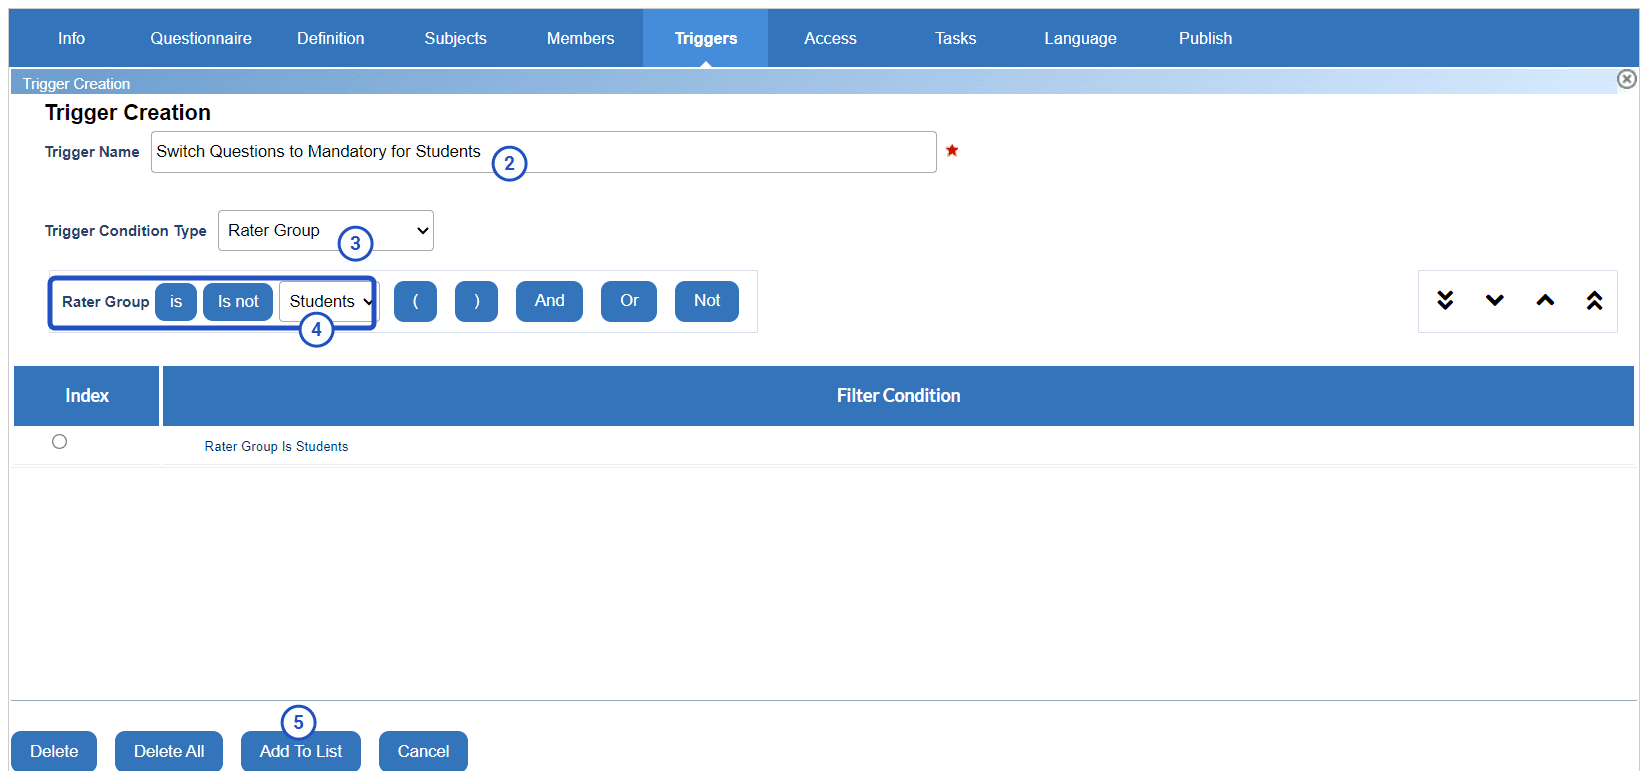
Get started by navigating to the Triggers page of your project.
- Click Add Trigger.
- Input a name for the trigger.
- Select Rater Group as the Trigger Condition Type.
- Select Students as the Rater Group.
- Click Add to List.
- Click Action next to the newly created trigger.
- Select which questions you wish to be mandatory for the students.
- Click Apply.
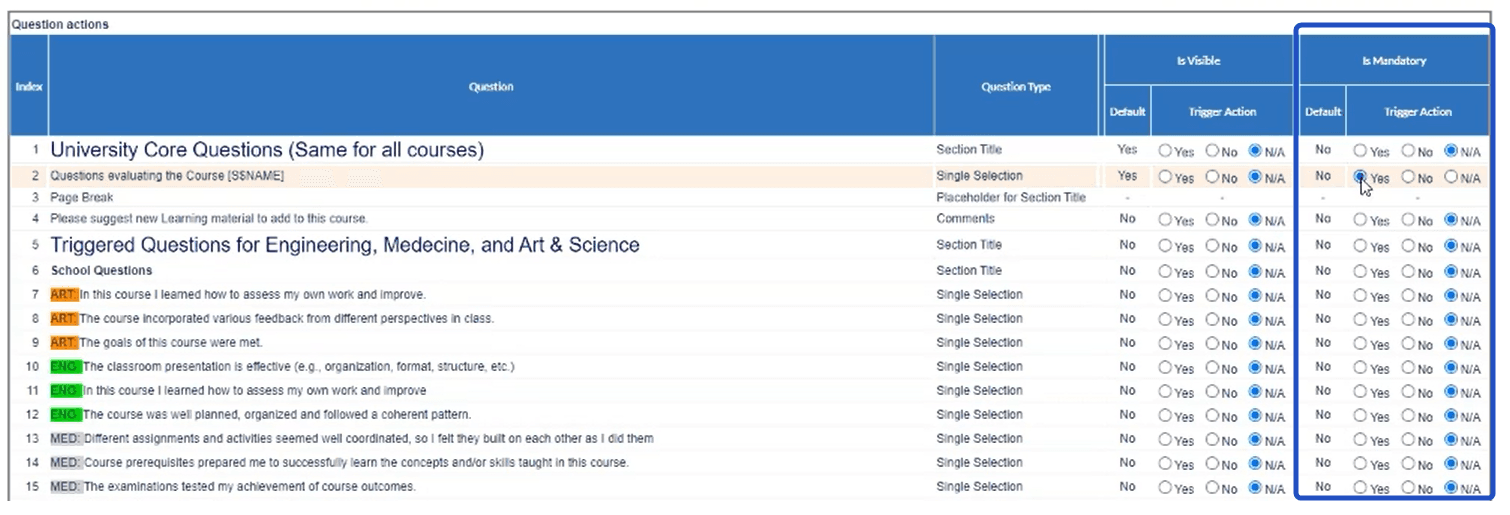
- Preview the student fillout from the QP task and validate that your mandatory questions are displayed. Note: A red asterisk next to a question indicates that it is mandatory to complete.
Tasks and their messaging (as they will look to the end user) should be verified by the administrator before publishing the project. This is particularly true if using the HTML editor or adding custom HTML because the HTML code may affect the layout of the task in unexpected ways and may even have an affect on accessibility.
Configure the task experience
Task title
Enter a task title which may appear in email subjects, browser title bars, and the task itself to clearly indicate what the task is. This field supports piping.
Welcome Message
Include a brief welcome message that will be displayed to the user when they arrive at the welcome page. It may be useful to explain the purpose of the task as well as any special instructions that are necessary to complete it. The message can styled with HTML code.
Configure the task list page
Task list page title
The title of the page when viewing the task list for this type of task in this project.
Task list page message
The message displayed above the task list for this task type in this project.
Displayed task name
How this task will be listed in the user's home page and their task list.
Advanced options
Access and synchronization
Allow modifications after submitting - Check this box to enable users with this task to re-access their task and make changes after they have already submitted it.
Show all questions in question personalization view - Check this box to display all the questions in question personalization view. If the box is unchecked, only personalized questions will be displayed.
Apply updated task dates to all open tasks
- When enabled, the task start and end dates for open tasks are updated automatically every time the project is saved, as well as being updated nightly when the automated updates occur. However, if the start and end dates were updated manually through task management or subject management they will not be updated automatically.
- When disabled, modifying dates for open tasks can only be performed manually through Task Management.
Task dates will be updated by the datasource for all open tasks except:
- when task dates are updated via a subject management task.
- when task dates are updated by an administrator via subject management.
- when task dates are updated by an administrator via task management.
Open tasks are all tasks except those that are completed and those that are expired.
Select the previous project to copy questions from - Choose one project that task owners will be able to copy their question selections from. In order for task owners to be able to select questions from a previous project, the following three items must match:
- the definition of the project
- the ID of the Question personalization task owner
- the ID of the questions
In order to be able to copy questions from a project, the questions in that project must have a question identifier.
Question selection quota
Optional and customizable questions quota - Select from the drop-down list the minimum and maximum number of optional and personalized questions that can be selected for Question Personalization. For multi-secondary subject projects, the minimum and maximum number of questions will apply to the primary and secondary subjects.
Authentication
- Require Authentication - Require users to enter their username and password to access the task.
- Include sign out link - A link allowing the user to sign out will be added to every page of the task. This feature can only be enabled when authentication is used. A sign out link will also be included on the task list that is accessible through email.
Impact of owner removal
Determine what should occur when the owner of a task has been removed and is no longer part of the project able to complete the task:
- No Effect - if more than one user is assigned to the task, the owner will be removed but the task will continue. Anything that the user has already submitted will be preserved.
- Stop Task - removing the user assigned to complete the task will result in the task being stopped even if other users have the ability to complete the task. Anything that the user already submitted will be preserved but cannot be changed or updated.
- Delete Task - tasks assigned only to the user being removed will be removed as well, any tasks the user already completed will also be removed. If there is more than one user assigned to the task, the task will continue with only that user being removed.
For fillout tasks, the impact of owner removal option does affect response rates. By default, in reports, for both No Effect and Stop Task the invited count does not change when an owner is removed. If Delete Task has been selected, the invited count is reduced when an owner is removed.
Analytics
Third Party Analytics Blue offers native Analytics tracking and reporting for fillout tasks. Third party tools like Google Analytics are also supported and can be used in conjunction with or instead of the native Analytics offering. Enable Third Party Analytics and then paste the necessary code into the text box to begin gathering data. Follow the steps below to use Google Analytics in Blue.