Use custom area and fork logic to direct survey flows
A custom area is a box section inside of a survey form. Within the custom area, multiple tabs are serving as different versions of survey content. There is always one default tab in a custom area, which will be shown in the questionnaire when there is no condition attached.
Fork logic allows you to direct respondents to alternate versions of content based on different conditions. By using custom area with fork logic , you can configure when each tab should be used in the questionnaire, in this way you can separate different survey flows.
You cannot apply logic to the content inside of a custom area.
In the example below you will find out how to configure a custom area with a fork logic. First of all, let's add a custom area to the form:
- Navigate to Form - Main page, and place the cursor where you want to insert the element.
- Select custom area icon (
 ) from Structure toolbar, and use the grid box to define how many tabs there should be.
You can use the plus ( ) and minus (
 ) to add or remove tabs.
- Add content into the first tab (A).
- Select the second tab (B) and add other content, repeat until all the tabs are filled with content.
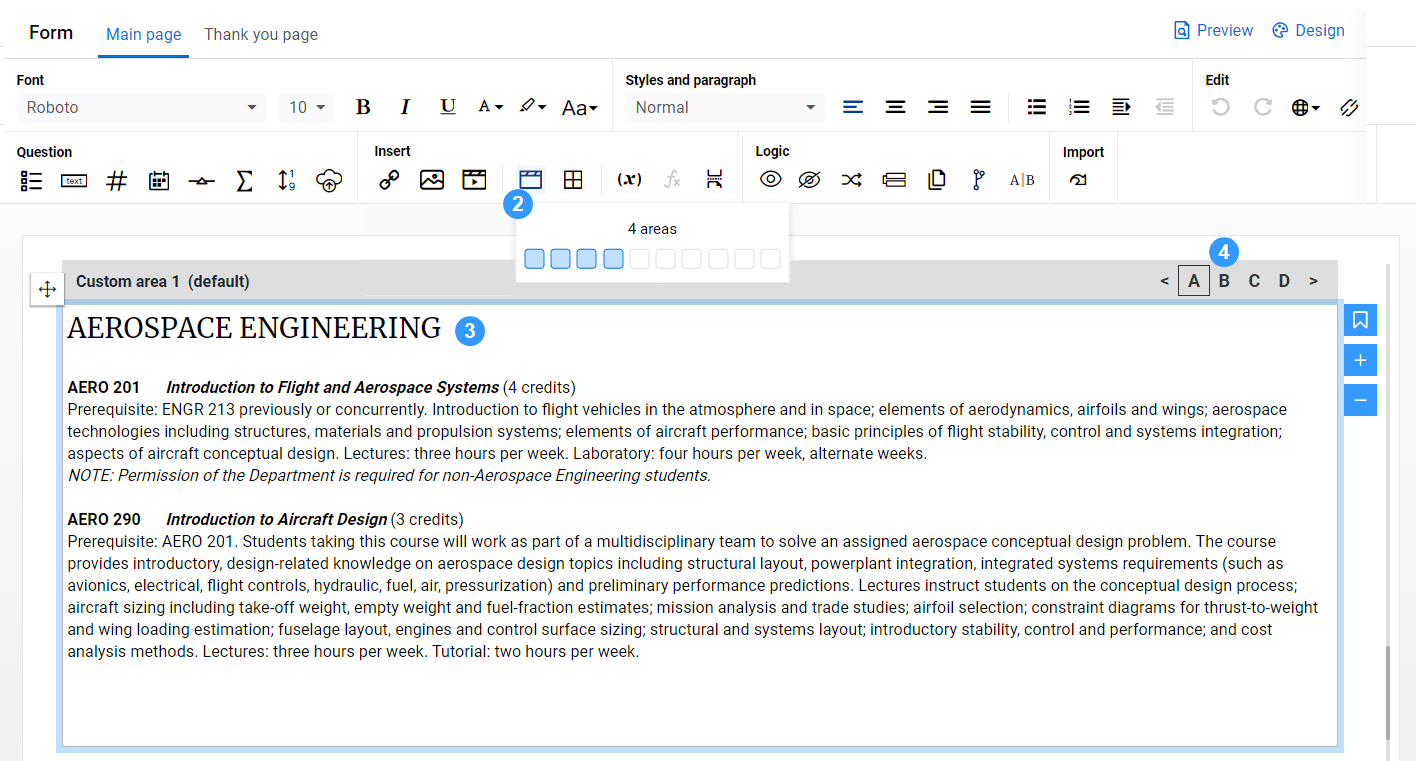
- Reselect the custom area and go to Custom area - Settings:
- Name the custom area (required).
- Enter a description.
- Modify the default area from the drop-down. Alternatively, open a different tab on Main page, use the bookmark icon (
 ) to set it as the new default tab.
Now with a custom area who has different content on each tab, you can then use fork actions to define when does each tab should be displayed in the questionnaire:
- Select the fork action (
 ) from Logic toolbar.
 - Rename the action.
Setting a name for each action is highly recommended because if you have more than one action of the same type, they would be named the same. A customized name will allow you to differentiate it from other actions.
- Select the tab letter in the custom area that you want to display, in this example, let's select tab A.
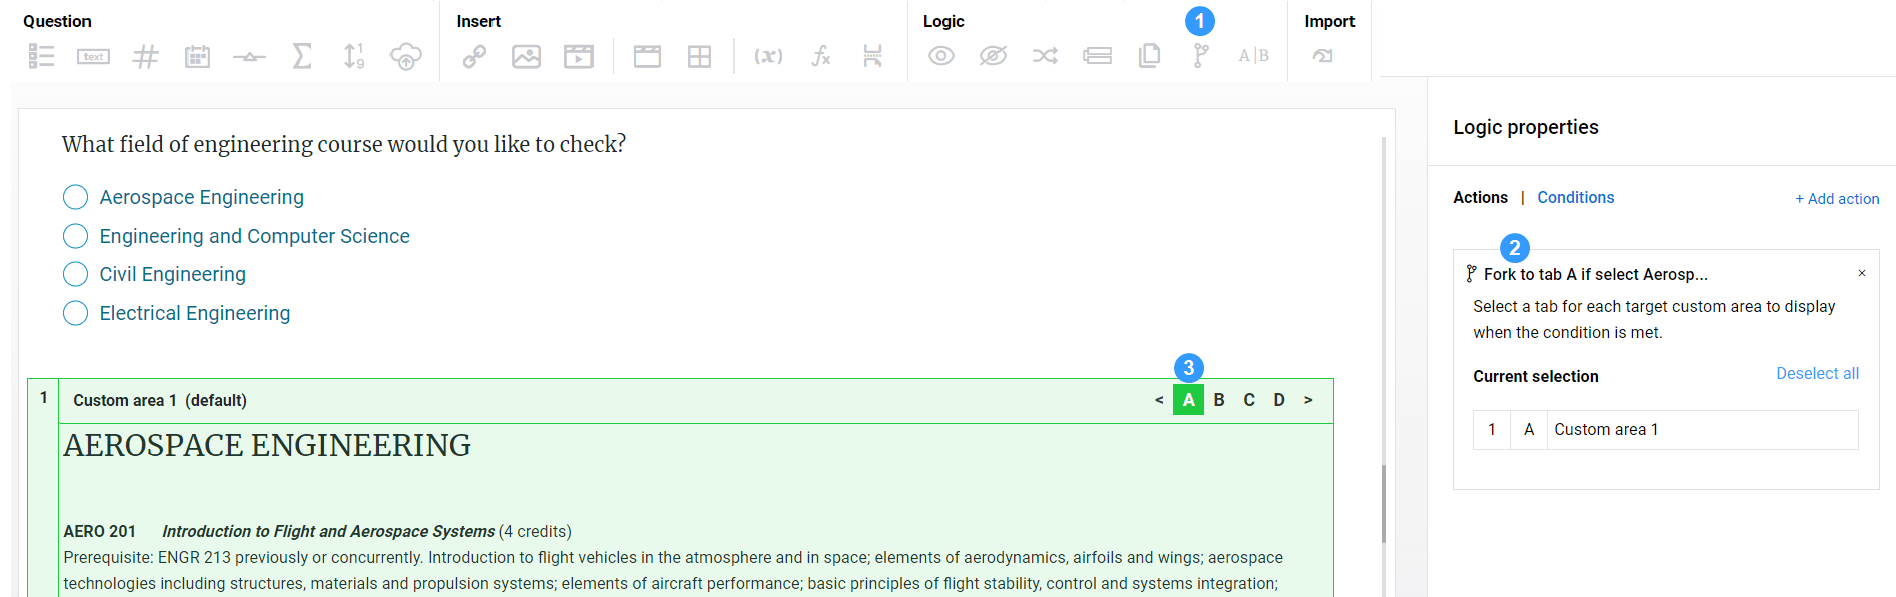
- Go to Conditions.
- Open the "No condition" drop down to select "Based on: question".
- Select the previous question in the form. This will appear in the Current selection section.
- Set up the condition.
- Select I'm done to finish.

Now your custom area will display the content in tab A on the questionnaire when the respondent chooses "Aerospace Engineering" as the answer. You can repeat this process to set up the rest of the tabs, so that the content will change based on the response given to the previous question. Try the instructions above as a practice to understand how do custom area and fork work as a team.